Git and GitHub for beginners: from clone to your first Pull Request
A hands-on Git and GitHub guide for beginners: clone (or fork) a project, create your branch, commit, open your first Pull Request, request a review and merge.
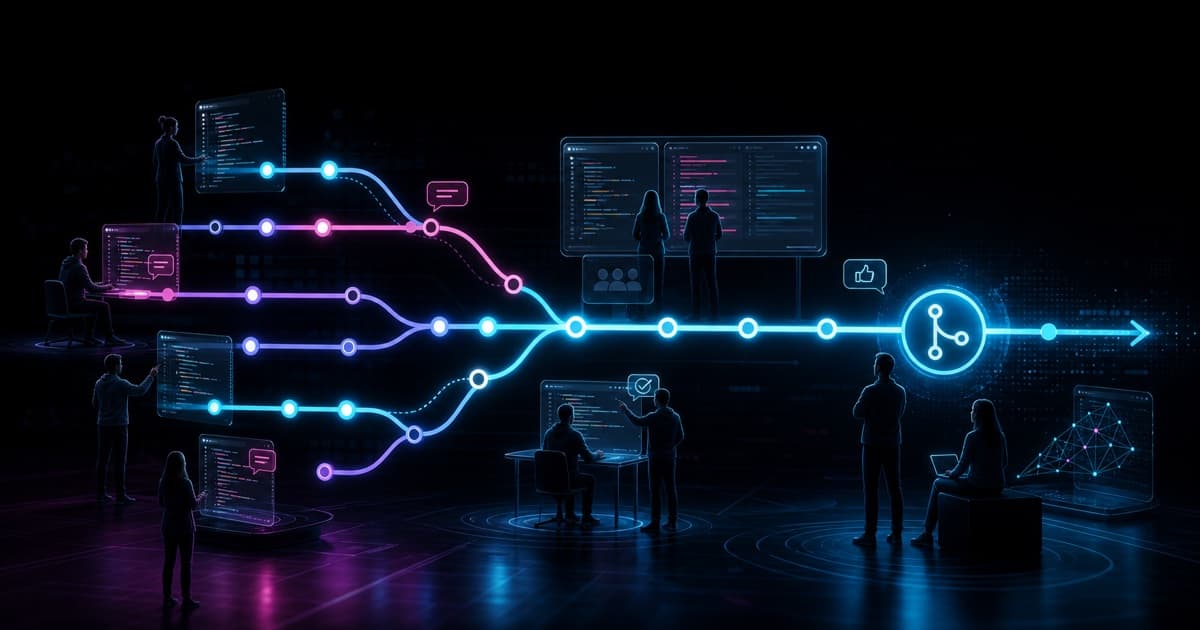
This guide takes you from zero to your first Pull Request on a real project. By the end you will have cloned (or forked) a repository, created a branch, made commits, opened a Pull Request, requested a review, and merged. Git keeps the history of your code on your machine. GitHub hosts that history in the cloud and adds collaboration: Pull Requests, review, and merge. Follow the steps in order and you make your first contribution without breaking anything.
As an example, we will use a real public repository: github.com/tgmarinho/investidor-calc. Swap it for your team's project URL when it counts.
What do you need before you start?
Three things: a GitHub account, Git installed, and your identity set. Confirm Git and tell it who you are (it shows up on your commits):
git --version                              # confirm Git is installed
git config --global user.name "Your Name"
git config --global user.email "you@email.com"
To authenticate without juggling passwords and tokens by hand, install the GitHub CLI and run gh auth login. It sets up Git's login with GitHub in one step.
What is the difference between Git and GitHub?
Git is the version control that runs on your machine. It records every change as commits, lets you go back in time, and lets you create parallel lines of work with branches. It works alone, offline.
GitHub hosts Git repositories in the cloud and adds collaboration on top: Pull Requests, code review, issues, and permissions. GitLab and Bitbucket are alternatives with the same concept. In short: Git is the tool, GitHub is where the team meets around it.
What is the minimal Git vocabulary?
Lock in these eight words and you understand almost any conversation about Git.
| Term | What it is |
|---|---|
| Repository | The project folder tracked by Git, with all its history. The "repo". |
| Commit | A snapshot of the code at one moment, with a message explaining the change. |
| Branch | An isolated line of work. A parallel copy of the code where you change things without touching main. |
| main | The main branch, stable and production-ready. It used to be called master. |
| Remote (origin) | The copy of the repository in the cloud (on GitHub). origin is its default nickname. |
| Clone | Downloading the remote repository to your machine for the first time (git clone). |
| Push / Pull | Sending your commits to the remote (push) and pulling other people's (pull). |
| Merge | Joining the code from one branch into another. |
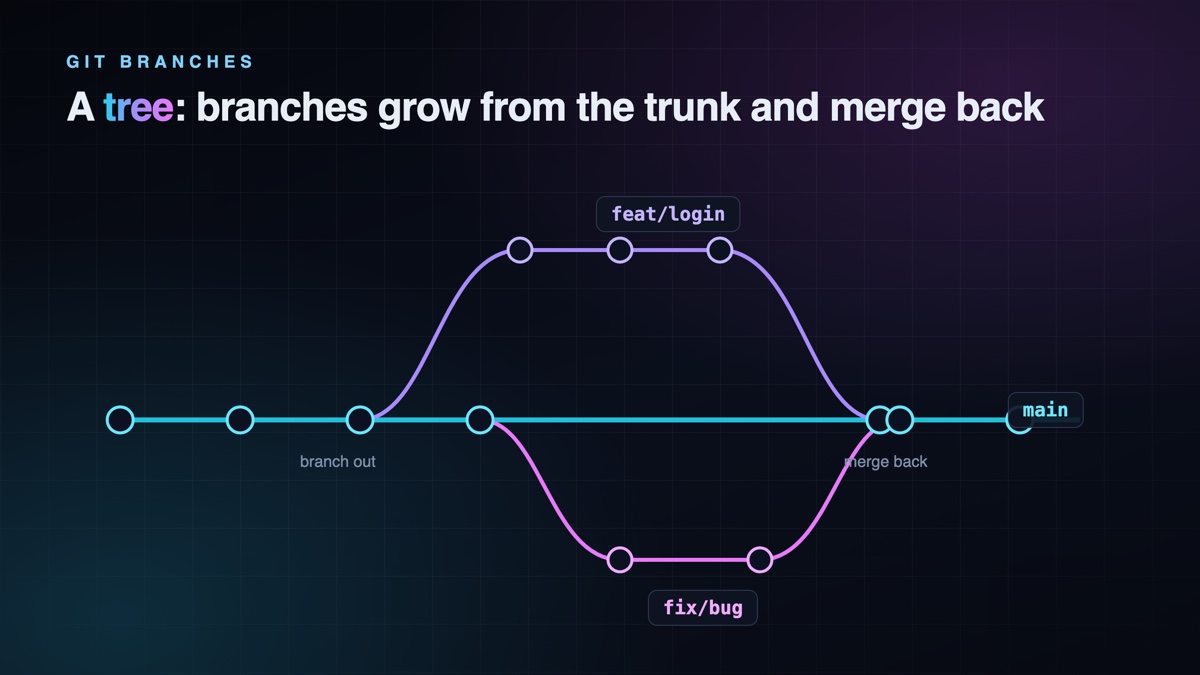
The central concept is the branch. Think of a tree: main is the trunk and each branch is a limb that grows out of it. For a task you create a branch that splits off from the trunk, work on it, and when you finish you merge the branch back into main. While the branch exists, main stays intact for the rest of the team.
What are the essential Git commands?
There are only a few, and you repeat almost all of them constantly. A commit has two steps: you select what goes in (the "stage", with git add) and then record it (git commit). These cover day-to-day work:
| Command | What it does |
|---|---|
git clone <url> | Downloads a remote repository to your machine for the first time. |
git status | Shows what changed: modified files, which are staged, and which branch you are on. The command you run most. |
git add <file> | Stages a file, selecting it for the next commit. git add . stages everything that changed. |
git commit -m "message" | Records a commit with the staged files. -m passes the message inline. |
git switch <branch> | Switches to an existing branch. git switch -c <name> creates a new one and enters it. |
git checkout <branch> | Older version of switch for changing branches (checkout -b creates). Also discards changes in a file: git checkout -- <file>. |
git pull | Brings remote commits into your branch and merges them with what you have. |
git push | Sends your local commits to the remote (GitHub). |
git branch -d <name> | Deletes a local branch that was already merged. |
git log --oneline | Lists the commit history, one per line. |
What is .gitignore and why does it matter?
The .gitignore is a text file at the root of the repository that lists what Git should ignore. Anything listed there does not show up in git status, does not go into commits, and never reaches GitHub. Each line is a file or folder pattern.
It matters for three reasons:
- Security. It keeps secrets out of the repository:
.envfiles, API keys, tokens, and credentials. A committed secret stays in the history forever, even if you delete the file later. - Clean repository. It avoids pushing what is generated or downloaded:
node_modules/, build folders (dist/,.next/), logs, and caches. That is recreated with one command, no need to version it. - Less noise. It ignores system and editor files (
.DS_Store,.vscode/) that only matter on your machine.
Example .gitignore for a Node project:
node_modules/
.env
.env.local
dist/
.next/
*.log
.DS_Store
One important detail: .gitignore only applies to files Git is not tracking yet. If you already committed a file before ignoring it, adding it to .gitignore does not remove it. Stop tracking it with:
git rm --cached .env # stops tracking it, but keeps the file on your machinePractical rule: create the .gitignore at the start of the project, before the first commit. Most projects already ship one for their stack, and gitignore.io generates one for yours.
Clone or fork: how do you get the code?
There are two scenarios, and the difference decides your first steps:
| Situation | What to do |
|---|---|
| You have access to the repository (you are a collaborator, the normal case on your team) | Clone it directly, create the branch in that same repo, and open the PR there. |
| You do not have access (someone else's public repo) | Fork it first (your own copy of the project), clone the fork, and open the PR from your fork to the original repository. |
A fork is a copy of the repository under your own account. You need it when you cannot push code straight to the original project. Since we are practicing on a public repo that is not yours, the steps below use the fork flow. If you are already a collaborator on your team's repo, skip the fork steps and clone the repository directly.
Step by step: your first Pull Request
-
Fork the repo. On
github.com/tgmarinho/investidor-calc, click "Fork". GitHub creates a copy atgithub.com/YOUR-USERNAME/investidor-calc. -
Clone your fork to your machine and enter the folder:
git clone https://github.com/YOUR-USERNAME/investidor-calc.git cd investidor-calc -
Point the original repository as
upstream. This lets you sync later. Your fork stays asorigin.git remote add upstream https://github.com/tgmarinho/investidor-calc.git -
Create your branch off
main. Use a descriptive name:git switch -c docs/fix-readme-typo -
Make a small change. For a first PR, something simple works, like fixing a typo in
README.md. Small changes are easier to review. -
Check, stage, and record the change:
git status # see what changed git add README.md # stage the file git commit -m "Fix typo in README" -
Push the branch to your fork (
origin):git push -u origin docs/fix-readme-typo -
Open the Pull Request. After the push, GitHub shows the "Compare & pull request" button. The base is the
mainof the original repository (tgmarinho/investidor-calc) and the compare is your branch. From the command line with the GitHub CLI:gh pr create --repo tgmarinho/investidor-calc --base main \ --title "Fix typo in README" \ --body "Fixes a typo in the installation section of the README." -
Write a good title and description. The description answers: what changes, why it changes, and how to test it. If the PR closes an issue, use
Closes #123so GitHub closes the issue on merge.
That is your first Pull Request. On your team's repo, the flow is the same without the fork steps: you clone the repo directly, create the branch, push to origin, and open the PR in the same repository.
How do you request and respond to a review?
On the PR page, use the Reviewers field to ask a teammate to review (on your team there is usually an owner or a code owner). Code review is when someone else reads your code before the merge: they read the diff, comment on parts, ask questions, and suggest changes. It is a team's main quality gate. The reviewer can:
- Comment on a line with a question or suggestion.
- Approve when everything looks good.
- Request changes when something needs fixing.
When they request changes, you do not open a new PR. You make more commits on the same branch and push; the PR updates itself:
git add .
git commit -m "Adjust text per review"
git push
How do you merge the Pull Request?
Once the PR is approved and the automation (tests, lint, build) is green, someone clicks "Merge" on GitHub. The change lands on main and the task branch can be deleted. GitHub offers three strategies, and the choice shapes the history:
| Strategy | What it does | When to use |
|---|---|---|
| Merge commit | Keeps every branch commit and creates a merge commit | When the team wants the full branch history |
| Squash and merge | Combines all PR commits into one on main | The most common default: clean history, one commit per PR |
| Rebase and merge | Replays the commits onto main with no merge commit | When the team wants a linear history |
Many teams use squash and merge: each PR becomes a single clean commit on main. After the merge, update your local main and delete the old branch. With a fork you pull from upstream; as a collaborator, a plain git pull is enough:
git switch main
git pull upstream main                # fork: pull the updated original main
git branch -d docs/fix-readme-typo
Why never commit straight to main or staging?
The most important rule on any team: nobody commits straight to main or staging. Every change goes in through a Pull Request. Those branches belong to everyone, so a direct commit there can break every teammate's environment with nothing reviewed.
Opening a PR guarantees four things a direct commit does not:
- Review. Someone else looks at the change before it becomes official.
- Automation. Tests, lint, and build run on the PR and block the merge if something breaks.
- History. Every change on
mainhas context, discussion, and a clear author. - Easy revert. If a PR caused a problem, you revert that whole merge in one move.
Teams close this door with a branch protection rule on GitHub: main and staging start requiring an approved PR and green checks, and direct commits stop being possible. Even without that protection, treat the rule as non-negotiable.
How does a team work together on GitHub?
The most common flow is the feature branch workflow: main stays stable and every new piece of work starts on a short branch that becomes a PR. Each person's daily cycle is:
- Update local
main(git pull). - Create a branch for the task (
git switch -c). - Work in small commits.
- Push the branch (
git push) and open the PR. - Go through code review and adjust.
- Merge once approved and the automation passes.
- Delete the branch and start again.
The most common problem is the merge conflict: when two people change the same line of the same file (you edit line 1 of App.tsx and a teammate does too), whoever pushes first lands cleanly; the second person gets a conflict, because Git does not know which version to keep and asks you to decide. This is one more reason not to commit straight to main: with PRs, the conflict shows up in an isolated, reviewable place. How to resolve it is in the next section.
The rule that holds a team together: short branches, small PRs, frequent merges. The smaller the gap between creating a branch and merging it, the fewer conflicts and the faster the review.
How do you simulate and resolve your first conflict?
The best way to lose the fear of conflicts is to cause one on purpose, in a test folder. Create a file on main, edit the same line on two branches, and have one meet the other:
git switch main
echo "Welcome to the project" > greeting.txt
git add greeting.txt && git commit -m "Add greeting"

git switch -c feat/greeting          # on this branch, change the line to: Welcome to our project
git commit -am "Change greeting on branch"

git switch main                      # on main, change the SAME line to: Welcome to the amazing project
git commit -am "Change greeting on main"

git merge feat/greeting              # the conflict fires here
Git stops and warns: CONFLICT (content): Merge conflict in greeting.txt. Open the file in your editor and you see the markers Git added:
<<<<<<< HEAD
Welcome to the amazing project
=======
Welcome to our project
>>>>>>> feat/greeting
Reading this is simple: between <<<<<<< HEAD and ======= is the code from your current branch (main); between ======= and >>>>>>> is the code coming from the other branch (feat/greeting). You decide which one stays. In VS Code, buttons appear above the block: Accept Current Change, Accept Incoming Change, or Accept Both Changes. You can also edit by hand and leave whatever final text you want.
After choosing, delete the three markers (<<<<<<<, =======, >>>>>>>), keep only the right code, and finish:
git add greeting.txt
git commit                           # completes the merge
If you want to give up midway and go back to the previous state, use git merge --abort. A conflict is not your mistake or a sign that something broke: it is just Git asking for a decision it cannot make on its own.
AI already writes Git for you (and resolves conflicts)
You no longer need to memorize commands. Coding agents like Claude Code and Cursor write Git for you: they create the branch, make the commits with clear messages, open the Pull Request, and resolve conflicts. You describe the intent ("create a branch, commit this, and open a PR") and the AI does the mechanical work.
This does not change the concept, it changes who types. The cycle stays the same: clone, branch, commit, PR, review, merge. But understanding the flow still matters, because you are the one who approves the PR and owns the change on main. Knowing what a branch, a PR, and a conflict are is what lets you review what the AI did instead of accepting it blindly.
What is the practical rule?
Your first PR is not about memorizing commands, it is about completing the cycle once with care: clone, branch, commit, push, PR, review, merge. After that, everything else (conflicts, merge strategies, automation) is variation on the same base. Isolate each change on a branch, explain the intent in clear commits, ask for review in small PRs, and merge fast.
Summary: to make your first Pull Request, you fork (or clone your team's repo), create a branch with git switch -c, make a small change, record it with git add and git commit -m, push with git push, and open the PR against main. The team reviews the code, you adjust with new commits, and the PR is merged (usually with squash) into main. Never commit straight to main or staging: always open a PR. Short branches, small PRs, and frequent merges keep a team fast and conflict-free.
Written by AI, reviewed by Thiago Marinho
July 27, 2026 · Brazil