GoBarber Web - Frontend Application with React
My class notes and code from the Rocketseat bootcamp; in this project we build a frontend that consumes the GoBarber Node.js API

We're going to build GoBarber WEB, which will consume the GoBarber Backend REST API in Node.js. We'll handle private routes, do JWT authentication, and receive an auth token. The user's authentication will be kept in Redux so that whenever we need the logged-in user we have access to their name and avatar.
Lesson 01 - Project structure
To get started, let's create a project with create-react-app:
npx create-react-app gobarber-webInstall and configure eslint:
yarn add eslint -DRun eslint init with the following config options:
gobarber-web on  master [!] took 8s
❯ yarn eslint --init
yarn run v1.12.0
$ /Users/tgmarinho/Developer/bootcamp_rocketseat_studies/gobarber-web/node_modules/.bin/eslint --init
? How would you like to use ESLint? To check syntax, find problems, and enforce code style
? What type of modules does your project use? JavaScript modules (import/export)
? Which framework does your project use? React
? Does your project use TypeScript? No
? Where does your code run? (Press <space> to select, <a> to toggle all, <i> to invert selection)Browser
? How would you like to define a style for your project? Use a popular style guide
? Which style guide do you want to follow? Airbnb (https://github.com/airbnb/javascript)
? What format do you want your config file to be in? JavaScript
? Would you like to install them now with npm? Yes
Let it install everything!
Remove package-lock.json and run yarn to refresh yarn.lock, since I'm using Yarn only.
Install the prettier and babel dependencies:
❯ yarn add babel-eslint prettier eslint-plugin-prettier eslint-config-prettier -DAnd configure .eslintrc.js:
module.exports = {
  env: {
    es6: true,
    jest: true,
    browser: true
  },
  extends: ["airbnb", "prettier", "prettier/react"],
  globals: {
    Atomics: "readonly",
    SharedArrayBuffer: "readonly",
    __DEV__: true
  },
  parserOptions: {
    ecmaFeatures: {
      jsx: true
    },
    ecmaVersion: 2018,
    sourceType: "module"
  },
  plugins: ["react", "jsx-a11y", "import", "react-hooks", "prettier"],
  rules: {
    "prettier/prettier": "error",
    "react/jsx-filename-extension": ["error", { extensions: [".js", ".jsx"] }],
    "import/prefer-default-export": "off",
    "no-unused-vars": ["error", { argsIgnorePattern: "^_" }],
    "react/jsx-one-expression-per-line": "off",
    "global-require": "off",
    "react-native/no-raw-text": "off",
    "no-param-reassign": "off",
    "no-underscore-dangle": "off",
    camelcase: "off",
    "no-console": ["error", { allow: ["tron"] }],
    "react-hooks/rules-of-hooks": "error",
    "react-hooks/exhaustive-deps": "warn"
  },
  settings: {
    "import/resolver": {
      "babel-plugin-root-import": {
        rootPathSuffix: "src"
      },
    },
  },
};
I removed some unnecessary files (see the GitHub repo) and left App.js with just a div.
Run yarn start to check it's working — a blank screen should appear.
Code: https://github.com/tgmarinho/gobarber-web/tree/aula-01-estrutura-projeto
Lesson 02 - API adjustments
We need to adjust the API on the gobarber backend.
Let's install cors so the frontend can hit our API.
yarn add corsAnd use it in app.js:
  middlewares() {
    this.server.use(Sentry.Handlers.requestHandler());
    this.server.use(cors());
    this.server.use(express.json());
    this.server.use(
      '/files',
      express.static(path.resolve(__dirname, '..', 'tmp', 'uploads'))
    );
  }
Since we're in development we won't pass any param, but in production we can set the allowed origin:
this.server.use(cors({'www.meuapp.com.br'}));Done. Now, on user login, we need to fetch the avatar,
so let's change SessionController.js to include the user avatar:
import * as Yup from 'yup';
import jwt from 'jsonwebtoken';
import authConf from '../../config/auth';
import User from '../models/User';
import File from '../models/File';

class SessionController {
  async store(req, res) {
    const schema = Yup.object().shape({
      email: Yup.string()
        .email()
        .required(),
      password: Yup.string().required(),
    });

    if (!(await schema.isValid(req.body))) {
      return res.status(400).json({ error: 'Validation fails' });
    }

    const { email, password } = req.body;

    const user = await User.findOne({
      where: { email },
      include: [
        {
          model: File,
          as: 'avatar',
          attributes: ['id', 'path', 'url'],
        },
      ],
    });
    if (!user) {
      return res.status(401).json({ error: 'User not found' });
    }

    if (!(await user.checkPassword(password))) {
      return res.status(401).json({ error: 'Password does not match!' });
    }

    const { id, name, avatar } = user;

    return res.json({
      user: {
        id,
        name,
        email,
        avatar,
      },
      token: jwt.sign({ id }, authConf.secret, {
        expiresIn: authConf.expireIn,
      }),
    });
  }
}

export default new SessionController();
To test it, you need the database running and Insomnia to hit the endpoints.
We also need the avatar in UserController.js since the user can change their avatar when editing their profile:
import * as Yup from 'yup';
import User from '../models/User';
import File from '../models/File';

class UserController {
  async store(req, res) {
    const schema = Yup.object().shape({
      name: Yup.string().required(),
      email: Yup.string()
        .email()
        .required(),
      password: Yup.string()
        .required()
        .min(6),
    });

    if (!(await schema.isValid(req.body))) {
      return res.status(400).json({ error: 'Validation fails' });
    }

    const userExists = await User.findOne({ where: { email: req.body.email } });
    if (userExists) {
      return res.status(400).json({ error: 'User already exists.' });
    }
    const { id, name, email, provider } = await User.create(req.body);
    return res.json({ id, name, email, provider });
  }

  async update(req, res) {
    const schema = Yup.object().shape({
      name: Yup.string(),
      email: Yup.string().email(),
      oldPassword: Yup.string().min(6),
      password: Yup.string()
        .min(6)
        .when('oldPassword', (oldPassword, field) =>
          oldPassword ? field.required() : field
        ),
      confirmPassword: Yup.string().when('password', (password, field) =>
        password ? field.required().oneOf([Yup.ref('password')]) : field
      ),
    });

    if (!(await schema.isValid(req.body))) {
      return res.status(400).json({ error: 'Validation fails' });
    }

    const { email, oldPassword } = req.body;
    const user = await User.findByPk(req.userId);
    if (user.email !== email) {
      const userExists = await User.findOne({
        where: { email },
      });
      if (userExists) {
        return res.status(400).json({ error: 'User already exists.' });
      }
    }
    // only do this if the old password was provided, i.e. user wants to change it
    if (oldPassword && !(await user.checkPassword(oldPassword))) {
      return res.status(401).json({ error: 'Password does not match.' });
    }

    await user.update(req.body);

    const { id, name, avatar, provider } = await User.findByPk(req.userId, {
      include: [
        {
          model: File,
          as: 'avatar',
          attributes: ['id', 'path', 'url'],
        },
      ],
    });

    return res.json({ id, name, email, avatar, provider });
  }
}

export default new UserController();
The last change is in ScheduleController.js where we also list the user name.
...
    const appointments = await Appointment.findAll({
      where: {
        provider_id: req.userId,
        canceled_at: null,
        date: {
          [Op.between]: [startOfDay(parsedDate), endOfDay(parsedDate)],
        },
      },
      include: [
        {
          model: User,
          as: 'user',
          attributes: ['name'],
        },
      ],
      order: ['date'],
    });
...
To continue building the frontend, the backend has to be running so we can consume the API.
In my case I start Docker with the redis, mongo and postgres containers:
docker start 3532f285cba4 b2c4654e6eda df1c4429c0a3And in the app:
yarn devCode: https://github.com/tgmarinho/gobarber-api/tree/aula-40-ajustes-na-api
Lesson 03 - Configuring routes
When we talk routes in React, we think React Router Dom — let's install it:
yarn add react-router-domIn src create the folders pages, services, and routes, plus an index.js inside routes and a history.js inside services. In pages create Dashboard, Profile, SignIn, SignUp, each with its own index.js, and using Rocketseat's snippet rfc + enter to scaffold each component.
Check the code for the route and history configuration.
Code: https://github.com/tgmarinho/gobarber-web/tree/aula-03-configurando-rotas
Lesson 04 - Configuring Reactotron
The Reactotron configuration is in the code; I've posted several articles on how to set it up.
Code: https://github.com/tgmarinho/gobarber-web/tree/aula-04-configurando-reactotron
Lesson 05 - Private routes
As it stands, we can access every route even without being logged in. Now we're going to control routes by checking whether the user is logged in.
Let's create a file called Route.js that wraps Route from react-router-dom:
We create a RouteWrapper function that receives the props of whichever component will use this wrapper. It takes the Component prop, isPrivate, and the rest spread via ...rest.
If the user isn't authenticated and the route is private, redirect to /.
If they're logged in and the route isn't private, redirect to dashboard. Otherwise render Route with the given component.
import React from 'react';
import PropTypes from 'prop-types';
import { Route, Redirect } from 'react-router-dom';

export default function RouteWrapper({
  component: Component,
  isPrivate = false,
  ...rest
}) {
  const signed = true;

  if (!signed && isPrivate) {
    return <Redirect to="/" />;
  }

  if (signed && !isPrivate) {
    return <Redirect to="/dashboard" />;
  }

  return <Route {...rest} component={Component} />;
}

RouteWrapper.propTypes = {
  isPrivate: PropTypes.bool,
  component: PropTypes.oneOfType([PropTypes.element, PropTypes.func])
    .isRequired,
};

RouteWrapper.defaultProps = {
  isPrivate: false,
};
In the index.js of the routes folder, I use this component instead of the react-router-dom Route:
import React from 'react';
import { Switch } from 'react-router-dom';
import SignIn from '../pages/SignIn';
import SignUp from '../pages/SignUp';
import Dashboard from '../pages/Dashboard';
import Profile from '../pages/Profile';

import Route from './Route';

export default function Routes() {
  return (
    <Switch>
      <Route path="/" exact component={SignIn} />
      <Route path="/register" component={SignUp} />
      <Route path="/dashboard" component={Dashboard} isPrivate />
      <Route path="/profile" component={Profile} isPrivate />
    </Switch>
  );
}
Done — just test it!
Code: https://github.com/tgmarinho/gobarber-web/tree/aula-05-rotas-privadas
Lesson 06 - Per-page layouts
Let's organize the shared layouts of the Login and SignUp screens using styled-components.
yarn add styled-componentsThe rest is styling.
In Route.js I added a bit of logic to show DefaultLayout or AuthLayout depending on whether the user is signed in.
import React from 'react';
import PropTypes from 'prop-types';
import { Route, Redirect } from 'react-router-dom';

import AuthLayout from '../pages/_layouts/auth';
import DefaultLayout from '../pages/_layouts/default';

export default function RouteWrapper({
  component: Component,
  isPrivate = false,
  ...rest
}) {
  const signed = false;

  if (!signed && isPrivate) {
    return <Redirect to="/" />;
  }

  if (signed && !isPrivate) {
    return <Redirect to="/dashboard" />;
  }

  const Layout = signed ? DefaultLayout : AuthLayout;

  return (
    <Route
      {...rest}
      render={props => (
        <Layout>
          <Component {...props} />
        </Layout>
      )}
    />
  );
}

RouteWrapper.propTypes = {
  isPrivate: PropTypes.bool,
  component: PropTypes.oneOfType([PropTypes.element, PropTypes.func])
    .isRequired,
};

RouteWrapper.defaultProps = {
  isPrivate: false,
};
The rest of the code is on the GitHub branch.
Code: https://github.com/tgmarinho/gobarber-web/tree/aula-06-layouts-por-pagina
Lesson 07 - Global styles
Let's use createGlobalStyle from styled-components for the app's global style:
import { createGlobalStyle } from 'styled-components';

export default createGlobalStyle`

@import url('https://fonts.googleapis.com/css?family=Roboto:400,700&display=swap');

* {
  margin: 0;
  padding: 0;
  outline: 0;
  box-sizing: border-box;
}

*:focus {
  outline: 0;
}

html, body, #root {
  height: 100%;

  body {
    -webkit-font-smoothing: antialiased;
  }

  body, input, button {
    font: 14px 'Roboto', sans-serif;
  }

  a {
    text-decoration: none;
  }

  ul {
    list-style: none;
  }

  button {
    cursor: pointer;
  }
}

`;
And apply it in App.js:
import './config/ReactotronConfig';
import React from 'react';
import { Router } from 'react-router-dom';
import Routes from './routes';
import history from './services/history';
import GlobalStyle from './styles/global';

function App() {
  return (
    <Router history={history}>
      <Routes />
      <GlobalStyle />
    </Router>
  );
}

export default App;
Code: https://github.com/tgmarinho/gobarber-web/tree/aula-07-estilos-globais
Lesson 08 - Using Root import
Instead of writing imports like ../../../MyFolder/MyFile.js, we can do better with a lib that resolves the paths for us — but first we need to customize Create React App's babel config.
For that, install:
yarn add customize-cra react-app-rewired -DAnd also:
yarn add babel-plugin-root-import -DCreate config-overrides.js at the project root:
const { addBabelPlugin, override } = require('customize-cra');

module.exports = override(
  addBabelPlugin([
    'babel-plugin-root-import',
    {
      rootPathSuffix: 'src',
    },
  ])
);
We import addBabelPlugin and override, then export the configuration overriding with the babel plugin we want, passing the plugin name and a config object — here rootPathSuffix: 'src', where our project JS lives.
Now we can write imports like:
import AuthLayout from '~/pages/_layouts/auth';
import DefaultLayout from '~/pages/_layouts/default';
The ~ symbol represents any nesting (../../../) up to src as the top level.
To make it work, swap the scripts in package.json:
"scripts": {
    "start": "react-app-rewired start",
    "build": "react-app-rewired build",
    "test": "react-app-rewired test",
    "eject": "react-scripts eject",
    "lint": "eslint --fix src --ext .js"
  },
Now run yarn start and check it all works! =)
But eslint is complaining about a few things...
Let's install this long-named lib so eslint understands the ~ we use in imports.
yarn add eslint-import-resolver-babel-plugin-root-importAnd in .eslintrc.js add this setting:
settings: {
    'import/resolver': {
      'babel-plugin-root-import': {
        rootPathSuffix: 'src',
      },
    },
  },
Now eslint stops complaining — just run yarn lint in the terminal.
But if you ctrl/cmd + click on the import path, it doesn't navigate to the file anymore.
import AuthLayout from '~/pages/_layouts/auth';To fix that, create a jsconfig.json with:
{
  "compilerOptions": {
    "baseUrl": "src",
    "paths": { "~/*": ["*"] }
  }
}
Now the editor understands the imports and we can navigate between files.
Code: https://github.com/tgmarinho/gobarber-web/tree/aula-08-utilizando-root-import
Lesson 09 - Styling the auth pages
Let's style the Login and Signup pages.
See the code: https://github.com/tgmarinho/gobarber-web/tree/aula-09-estilizacao-da-page-autenticacao
Lesson 10 - Using Unform
For state management we'd have to convert the function to a class or use hooks and create a state for each input. Rocketseat built a performant lib for forms, https://github.com/Rocketseat/unform, which we'll use here. Let's install it:
yarn add @rocketseat/unformAnd use it:
import React from 'react';
import { Link } from 'react-router-dom';
import { Form, Input } from '@rocketseat/unform';
import logo from '~/assets/logo.svg';

export default function SignIn() {
  function handleSubmit(data) {
    console.tron.log(data);
  }

  return (
    <>
      <img src={logo} alt="GoBarberWeb" />
      <Form onSubmit={handleSubmit}>
        <Input name="email" type="email" placeholder="Seu e-mail" />
        <Input
          name="password"
          type="password"
          placeholder="Sua senha secreta"
        />

        <button type="submit">Acessar</button>
        <Link to="/register">Criar conta gratuíta</Link>
      </Form>
    </>
  );
}
What's nice is that you just pass name on the inputs and an onSubmit handler — all the filled values come into the data variable.
Look how clean — no need for:
const [name, setName] = useState('');
const [email, setEmail] = useState('');
const [password, setPassword] = useState('');
and no setPassword(e.target.value), etc.
What was already good got even better!
Other form libraries on the market:
React Hook Form looks like a good option, alongside Rocketseat's Unform.
See the rest of the changes in the code.
code: https://github.com/tgmarinho/gobarber-web/tree/aula-10-utilizando-unform
Lesson 11 - Validations
Let's install and use yup, which is great for validating both frontend and backend.
yarn add yupYup uses schema validation, inspired by joi — also a great validation lib.
Validating the SignUp:
import * as Yup from  'yup';

const schema = Yup.object().shape({
  name: Yup.string().required('O nome é obrigatório'),
  email: Yup.string()
    .email('Insira um email válido')
    .required('O Email é obrigatório'),
  password: Yup.string()
    .min(6, 'A senha precisa de ter 6 caracteres no mínimo')
    .required('A Senha é obrigatória'),
});

<Form  schema={schema}  onSubmit={handleSubmit}>
...
</Form>
Nice — now we have schema validation per field.
When an error happens, an error message is rendered on screen, and we can style that span:
src/pages/_layout/auth/styles.js:
  span {
      color: #fb6f91;
      align-self: flex-start;
      margin: 0 0 10px;
      font-weight: bold;
    }
Now the message renders nicely!
See the rest of the code below.
code: https://github.com/tgmarinho/gobarber-web/tree/aula-11-validacoes
Lesson 12 - Setting up the Redux Store
We'll do user auth via Redux and store the token plus the logged-in user data, accessible from anywhere.
Install all required libs:
yarn add redux redux-saga react-redux reactotron-redux reactotron-redux-saga immerAll Redux and Redux Saga setup and the React-Redux integration are in the code, and were explained in previous posts: https://www.tgmarinho.com/arquitetura_flux/
code: https://github.com/tgmarinho/gobarber-web/tree/aula-12-configurando-store
Lesson 13 - Authentication
Login implementation — but we're not persisting user data or token anywhere yet, so refreshing wipes the store.
code: https://github.com/tgmarinho/gobarber-web/tree/aula-13-autenticacao
Lesson 14 - Storing the profile
We'll store user data in a separate reducer called user.
Two reducers can listen to the same actions — both user and auth will react to @auth/SIGN_IN_SUCCESS and store the values relevant to each. Even though the user comes back during authentication, we keep it in user because profile editing isn't an auth concern.
code: https://github.com/tgmarinho/gobarber-web/tree/aula-14-armazenando-perfil
Lesson 15 - Persisting authentication
Let's persist auth data in the browser storage so it survives page refresh.
We'll use a helper lib:
yarn add redux-persistredux-persist integrates with the browser localStorage, React Native AsyncStorage, and some local databases.
Integrate it with our app:
Create persistReducers.js inside src/store:
import storage from 'redux-persist/lib/storage';
import { persistReducer } from 'redux-persist';

export default reducers => {
  const persistedReducer = persistReducer(
    {
      key: 'gobarber',
      storage,
      whitelist: ['auth', 'user'],
    },
    reducers
  );

  return persistedReducer;
};
We import storage and persistReducer from redux-persist.
We create a function that takes the reducers as a parameter and returns persistedReducer. persistReducer receives a config object with the localStorage key, the storage implementation, and a whitelist of reducers to persist. All this is documented in the library.
Now use this function in src/store/index.js:
import { persistStore } from 'redux-persist';
import createSagaMiddleware from 'redux-saga';
import createStore from './createStore';
import persistReducers from './persistReducers';
import rootReducer from './modules/rootReducer';
import rootSaga from './modules/rootSaga';

const middlewares = [];

const sagaMonitor =
  process.env.NODE_ENV === 'development'
    ? console.tron.createSagaMonitor()
    : null;

const sagaMiddleware = createSagaMiddleware({ sagaMonitor });

middlewares.push(sagaMiddleware);

const store = createStore(persistReducers(rootReducer), middlewares);
const persistor = persistStore(store);

sagaMiddleware.run(rootSaga);

export { store, persistor };
I imported persistStore from redux-persist and persistReducers from the file we just created.
We call persistReducers passing the rootReducer with all reducers, when creating the store:
const store = createStore(persistReducers(rootReducer), middlewares);We create a persistor constant from persistStore(store), responsible for rehydrating the reducers from localStorage.
const persistor = persistStore(store);Finally we export both store and persistor:
export { store, persistor };That breaks the app since the export is no longer default — we have to import store and persistor individually.
So in Route.js and App.js we fix it:
Route.js:
...
import { store } from  '~/store';
...App.js:
import './config/ReactotronConfig';
import React from 'react';
import { PersistGate } from 'redux-persist/integration/react';
import { Router } from 'react-router-dom';
import { Provider } from 'react-redux';
import Routes from './routes';
import history from './services/history';
import GlobalStyle from './styles/global';
import { store, persistor } from './store';

function App() {
  return (
    <Provider store={store}>
      <PersistGate persistor={persistor}>
        <Router history={history}>
          <Routes />
          <GlobalStyle />
        </Router>
      </PersistGate>
    </Provider>
  );
}

export default App;
We import store, persistor, and the PersistGate component from redux-persist.
Wrap the app inside PersistGate passing our persistor.
 <PersistGate persistor={persistor}>
   <Router history={history}>
      <Routes />
      <GlobalStyle />
   </Router>
</PersistGate>
Now the app works again — when the user logs in, the whitelist reducers are persisted to localStorage, and when they leave they remain logged in because the data is rehydrated from localStorage.
LocalStorage:
{,…}
auth: "{"token":"eyJhbGciOiJIUzI1NiIsInR5cCI6IkpXVCJ9.eyJpZCI6MTAsImlhdCI6MTU3MDYyOTY0NywiZXhwIjoxNTcxMjM0NDQ3fQ.8_7pqc7Ds2yudoPNr0r3NO_DnH2t9fgMOwxvIRuqwRs","signed":true,"loading":false}"
user: "{"profile":{"id":10,"name":"Avatolino Cliente","email":"avatar@gmail.com","provider":true,"avatar":null}}"
_persist: "{"version":-1,"rehydrated":true}"
Reactotron:

Done — the login flow is fully automated now.
code: https://github.com/tgmarinho/gobarber-web/tree/aula-15-persistindo-autenticacao
Lesson 16 - Auth loading state
- Refactored the reducer so we don't have to keep writing:
return produce(state, draft => { ... }- Added two more cases on the auth reducer for REQUEST, SUCCESS, and FAILURE.
- In SignIn I used
useSelectorto grab the loading state and used a ternary to show 'Loading...' whentrueand 'Sign in' whenfalse. - In the saga I added a try/catch to capture API errors and dispatch a sign-in failure action.
See the code for details.
code: https://github.com/tgmarinho/gobarber-web/tree/aula-16-loading-da-autenticacao
Lesson 17 - Displaying toasts
- Installed:
yarn add react-toastifyto surface messages to the user - Added the
ToastContainertoApp.jswith auto-close after 3 seconds - Imported the react-toastify styles:
import 'react-toastify/dist/ReactToastify.css';inglobal.js - In the auth saga I removed
console.logcalls and added:toast.error('user is not a service provider');
code: https://github.com/tgmarinho/gobarber-web/tree/aula-17-exibindo-toasts
Lesson 18 - Sign-up flow
Now let's add a new GoBarberWeb sign-up.
- Created a new action
signUpRequestthat takes name, email and password - In the saga, created a new
signUpfunction listening toSIGN_UP_REQUEST:
export function* signUp({ payload }) {
  try {
    const { name, email, password } = payload;

    yield call(api.post, 'users', {
      name,
      email,
      password,
      provider: true,
    });

    history.push('/');
  } catch (err) {
    toast.error('Falha no cadastro verifique seus dados!');
    yield put(signFailure());
  }
}

export default all([
  takeLatest('@auth/SIGN_IN_REQUEST', signIn),
  takeLatest('@auth/SIGN_UP_REQUEST', signUp),
]);
- In the SignUp
index.jsI dispatched the action with the user data.
code: https://github.com/tgmarinho/gobarber-web/tree/aula-18-cadastro-na-aplicacao
Lesson 19 - Authenticated requests
Some API routes require us to be authenticated and to send an auth token.
To do that we set the token on the axios Authorization header.
So right after login we set the Bearer token on api.defaults.headers.Authorization:
api.defaults.headers.Authorization = `Baerer ${token}`;But on refresh, we lose that header.
To make it stick we let the saga listen to persist/REHYDRATE, which carries the auth and user payload (including the token).
takeLatest('persist/REHYDRATE', setToken),That action runs setToken, doing the same thing as above — adding the bearer to the header.
The action retrieves the data from localStorage where the token is available:
export function setToken({ payload }) {
  if (!payload) return;
  const { token } = payload.auth;
  if (token) {
    api.defaults.headers.Authorization = `Baerer ${token}`;
  }
}
Full saga code:
import { takeLatest, call, put, all } from 'redux-saga/effects';
import { toast } from 'react-toastify';
import api from '~/services/api';
import history from '~/services/history';
import { signInSuccess, signFailure } from './actions';

export function* signIn({ payload }) {
  try {
    const { email, password } = payload;
    const response = yield call(api.post, 'sessions', {
      email,
      password,
    });

    const { token, user } = response.data;

    if (!user.provider) {
      toast.error('usuario nao é prestador de servico');
      return;
    }

    api.defaults.headers.Authorization = `Baerer ${token}`;

    yield put(signInSuccess(token, user));

    history.push('/dashboard');
  } catch (err) {
    toast.error('Falha na autenticação, verifique seu email/senha');
    yield put(signFailure());
  }
}

export function* signUp({ payload }) {
  try {
    const { name, email, password } = payload;

    yield call(api.post, 'users', {
      name,
      email,
      password,
      provider: true,
    });

    history.push('/');
  } catch (err) {
    toast.error('Falha no cadastro verifique seus dados!');
    yield put(signFailure());
  }
}

export function setToken({ payload }) {
  if (!payload) return;
  const { token } = payload.auth;
  if (token) {
    api.defaults.headers.Authorization = `Baerer ${token}`;
  }
}

export default all([
  takeLatest('persist/REHYDRATE', setToken),
  takeLatest('@auth/SIGN_IN_REQUEST', signIn),
  takeLatest('@auth/SIGN_UP_REQUEST', signUp),
]);
To test it we made a simple call on the dashboard:
import React from 'react';
import api from '~/services/api';
// import { Layout } from './styles';

export default function Dashboard() {
  api.get('appointments');

  return <h1>Dashboard</h1>;
}
And on Chrome's network tab I could see a 204 status on the appointments route — it worked!
code: https://github.com/tgmarinho/gobarber-web/tree/aula-19-requisicoes-autenticadas
Lesson 20 - Configuring the Header
- Built and styled the Header
- Added a new purple logo for the header
code: https://github.com/tgmarinho/gobarber-awebi/tree/aula-20-configurando-header
Lesson 21 - Styling notifications
- Installed react-icons and react-perfect-scrollbar (for scrolling notifications)
- Styled and created a
Notificationscomponent used in the Header - Lots of CSS detail with styled-components
code: https://github.com/tgmarinho/gobarber-web/tree/aula-21-estilizando-notificacoes
Lesson 22 - Notifications
- Installed
date-fnsfor handling dates on the frontend - Built all the logic to show the badge and the notifications from the MongoDB data via the
notificationsAPI route.
code: https://github.com/tgmarinho/gobarber-web/tree/aula-22-notificacoes
Lesson 23 - Profile page
- Created the Profile component
- Styled it with CSS and styled-components
code: https://github.com/tgmarinho/gobarber-web/tree/aula-23-pagina-de-perfil
Lesson 24 - Updating Profile
- Used
useDispatchto send the form data to the saga, which updates the database via the API - Created request, success, and failure actions for profile update
- Updated the user reducer
- Now whatever the user types in the form is persisted in the DB and the profile is updated accordingly.
code: https://github.com/tgmarinho/gobarber-web/tree/aula-24-atualizando-perfil
Lesson 25 - Profile picture
Inside the Profile folder, create another folder AvatarInput with index.js and styles.js.
In index.js create a functional component using Rocketseat's snippets: rfc + enter.
index.js:
import React, { useState, useEffect, useRef } from 'react';
import { useField } from '@rocketseat/unform';
import api from '~/services/api';
import { Layout } from './styles';

export default function AvatarInput() {
  const ref = useRef();

  const { defaultValue, registerField } = useField('avatar');

  const [file, setFile] = useState(defaultValue && defaultValue.id);
  const [preview, setPreview] = useState(defaultValue && defaultValue.url);

  useEffect(() => {
    if (ref.current) {
      registerField({
        name: 'avatar_id',
        ref: ref.current,
        path: 'dataset.file',
      });
    }
  }, [ref.current]); // eslint-disable-line

  async function handleChange(e) {
    const data = new FormData();

    data.append('file', e.target.files[0]);
    const response = await api.post('files', data);
    const { id, url } = response.data;

    setFile(id);
    setPreview(url);
  }

  return (
    <Layout>
      <label htmlFor="avatar">
        <img
          src={
            preview || 'https://api.adorable.io/avatars/285/abott@adorable.png'
          }
          alt=""
        />
        <input
          type="file"
          id="avatar"
          accept="image/*"
          data-file={file}
          onChange={handleChange}
          ref={ref}
        />
      </label>
    </Layout>
  );
}
This one's a bit more complex.
const ref = useRef();Create a ref to grab the HTML tag — in this case the file input.
const { defaultValue, registerField } = useField('avatar');We use AvatarInput inside Profile:
  <Layout>
      <Form initialData={profile} onSubmit={handleSubmit}>
        <AvatarInput name="avatar_id" />
        <Input name="name" placeholder="Nome completo" />
        ....
        ...
        ...
        </Layout>
And initialData={profile} has several fields — one of them is the user avatar, which can be null or an object with { id, path, url }.
So useField('avatar') passes those values to defaultValue and returns a registerField function used inside useEffect whenever ref.current (i.e. the file input) changes.
The ref.current is this:
<img src="[http://localhost:3333/files/517d708aba8e96b40ee54c8ba0e56815.jpg](http://localhost:3333/files/517d708aba8e96b40ee54c8ba0e56815.jpg "http://localhost:3333/files/517d708aba8e96b40ee54c8ba0e56815.jpg")" alt="">It's the input =)
I'll confess: I know what is happening, but I don't really know how. #mindblown https://www.youtube.com/watch?v=p1h3gaCIICA
React is like that — I don't know what happened, I only know it happened!
OK, I'll stop trolling the post!
const [file, setFile] =  useState(defaultValue && defaultValue.id);
const [preview, setPreview] =  useState(defaultValue && defaultValue.url);
Two state hooks: file holds the avatar id, preview holds the avatar URL pointing to the API where it's hosted.
The useEffect below: if there's a ref.current, register the field with name: 'avatar_id' (the field name expected by the API), the current ref, and the dataset.file path that maps to the data-file attribute on the input — i.e. the avatar id.
useEffect(() => {
    if (ref.current) {
      registerField({
        name: 'avatar_id',
        ref: ref.current,
        path: 'dataset.file',
      });
    }
  }, [ref.current]); // eslint-disable-line
This async function runs every time the file input changes: create a FormData, append a file field (the same one the API expects), and pass the first file from e.target.files. Call the API posting to the files route. Then grab the id and URL from the response and set file and preview (which now has a URL and renders the preview). When this runs, the file is already uploaded to the server's tmp folder (could be Amazon S3) and the file data is saved in the files table — but the link to the user only happens when the user submits the profile form.
 async function handleChange(e) {
    const data = new FormData();

    data.append('file', e.target.files[0]);
    const response = await api.post('files', data);
    const { id, url } = response.data;

    setFile(id);
    setPreview(url);
  }
Finally, the React code with the profile image and file input — if preview has the user avatar URL, show it; otherwise show a generic image from the adorable API.
The upload input is of type file with id avatar so htmlFor="avatar" ties the label, it accepts images only, and has a data-set holding the file id; onChange runs handleChange to send the avatar to the API, and ref is the React ref to the input.
return (
    <Layout>
      <label htmlFor="avatar">
        <img
          src={
            preview || 'https://api.adorable.io/avatars/285/abott@adorable.png'
          }
          alt=""
        />
        <input
          type="file"
          id="avatar"
          accept="image/*"
          data-file={file}
          onChange={handleChange}
          ref={ref}
        />
      </label>
    </Layout>
  );
This was definitely the hardest one to follow, with some new concepts around useRef, Unform's useField, and Custom Hooks.
code: https://github.com/tgmarinho/gobarber-web/tree/aula-25-foto-perfil
Lesson 26 - Header data
- Pulled data from the user profile state and populated the Header
- Fixed the header image to a fixed width and height
code: https://github.com/tgmarinho/gobarber-web/tree/aula-26-dados-header
Lesson 27 - Logout
We wrapped up auth by adding logout — when the user clicks the logout button, the saga listens, changes the route to home (/), clears the profile data, removes the token, sets signed to false, and the user is sent to the login page.
code: https://github.com/tgmarinho/gobarber-web/tree/aula-27-logout-da-aplicacao
Lesson 28 - Dashboard styling
- Created the styles and used the components in the Dashboard
code: https://github.com/tgmarinho/gobarber-web/tree/aula-28-estilizacao-do-dashboard
Lesson 29 - Day navigation
- Used date-fns to add and subtract days from the
datestate placed between the arrows.
code: https://github.com/tgmarinho/gobarber-web/tree/aula-29-navegacao-entre-dias
Lesson 30 - Listing appointments
- Fetched schedules from the API for the day the user is viewing in the dashboard, handled the timezone, and assembled an array of objects with
time,past, andappointmentto render on screen.
code: https://github.com/tgmarinho/gobarber-web/tree/aula-30-listando-agendamentos
Final result:
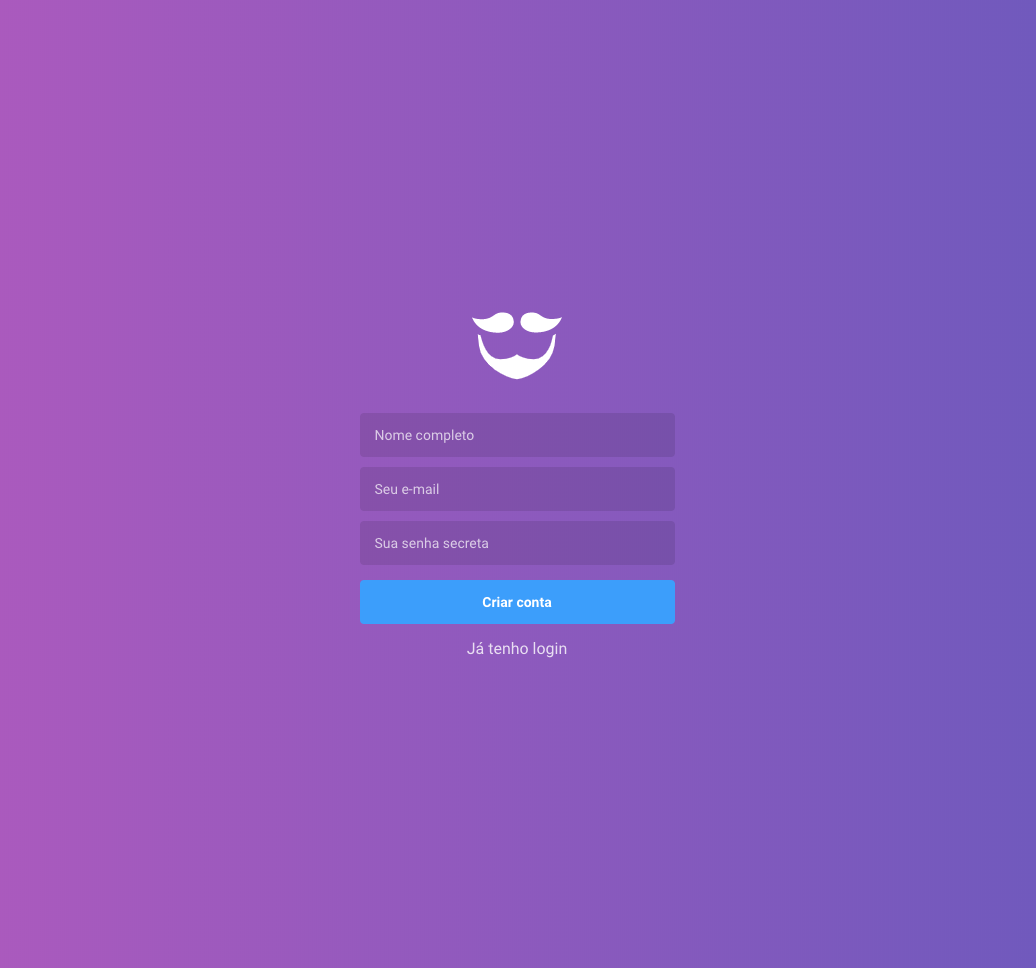
-
Sign-up
-
Profile

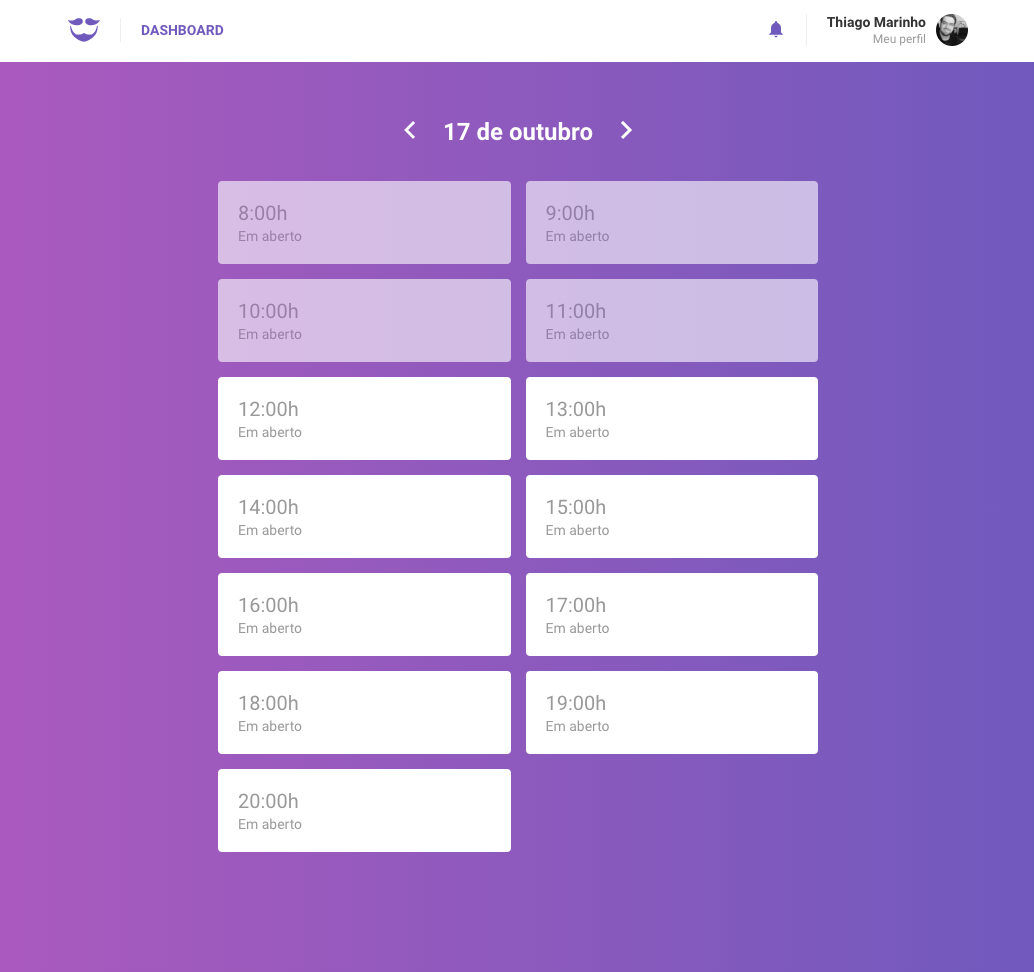
-
Dashboard
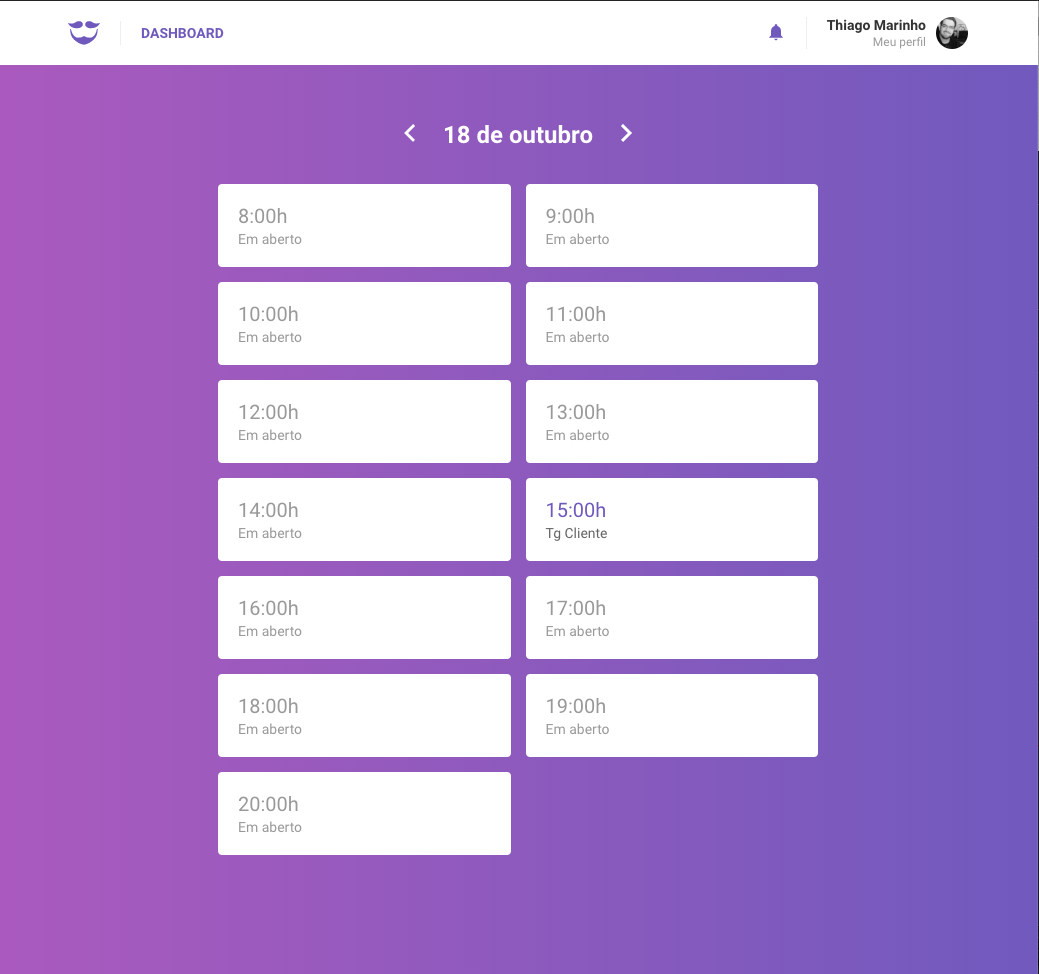
-
Dashboard 2
The end!
Photo by Peter Thomas on Unsplash
Written by AI, reviewed by Thiago Marinho
October 17, 2019 · Brazil