Introduction to React Native
How to set up webpack, babel, and the CSS and image loaders, plus the main React lifecycle methods

First React Native project
An app that fetches GitHub users, shows their basic data and starred repositories, and saves it to the phone's local database.
Stack
- React
- React Native
- Styled Components
- ESLint, Prettier, EditorConfig
- AsyncStorage
- React Navigation
- React Vector Icons
- Axios
Lesson 01 - React Native concepts
What is React Native?
- It's the React version for mobile development. Just as React is used to build interfaces, RN is a library that lets you create UIs for mobile devices on Android and iOS, with some differences from ReactJS.
- It's cross-platform, so you can write the same code for iOS and Android and still handle some OS-specific details.
- React Native takes the entire built UI and converts it to Java and Objective-C — you don't use a webview, but the native components of the underlying OS, which gives a much better and more performant user experience.
- The code is not transpiled; it runs through a dependency called JSCore, which makes it possible to write the code in JavaScript.
- Microsoft has more than 40 apps built with React Native.
Architecture
How does RN convert JS code into a native UI?
The JavaScript code goes through a tool called Metro Bundler (packager), which watches all the JavaScript code, takes everything, and generates bundle.js. Metro Bundler is comparable to Webpack on the web. The generated bundle is passed to the Bridge, which is the communication channel between JavaScript and native code. The Bridge transforms whatever UI is needed from the bundle into Android and iOS code — Java and Objective-C.
architecture image
Syntax
pull from the slide
- Component declaration is the same as on the web
- We don't use HTML, but native components
- Styling is applied without classes or IDs
- All text uses
<Text />; there's no inline styling on its own - To create styles, you use
StyleSheetand CSS-in-JS - Or you can use
styled-components/native - Yoga is responsible for converting the CSS into Objective-C and Java
What is Expo?
- An SDK with a set of ready-to-use features (camera, video, integrations);
- You don't need to configure an emulator — Expo has its own app and you load your app inside it.
- It greatly simplifies development.
Generally, it's not ideal because it limits control of native code: if you need to touch Java or Objective-C, you can't with Expo. Many libraries also don't support Expo.
Source code: https://github.com/tgmarinho/intro-react-native/tree/aula-01-conceitos-react-native
Lesson 02 - Development environment
To set up the development environment, just follow the tutorials from Rocketseat — this doc is excellent.
Source code: https://github.com/tgmarinho/intro-react-native/tree/aula-02-ambiente-desenvolvimento
Lesson 03 - Creating a project
To create a React Native project, you can install react-native-cli, or use npx.
To install via the CLI, just install react-native-cli globally:
yarn add react-native-cli And to create the project, run:
react-native init ProjectNameOr, if you want to use npx:
npx react-native init MyAwesomeAppAfter creating the project, the console shows what to do next. Enter the project folder and run the emulator:
- iOS
react-native run-ios- Android — the emulator must be open before running the command.
react-native run-androidThe process can take a while depending on your machine. Time for an unsweetened tea!
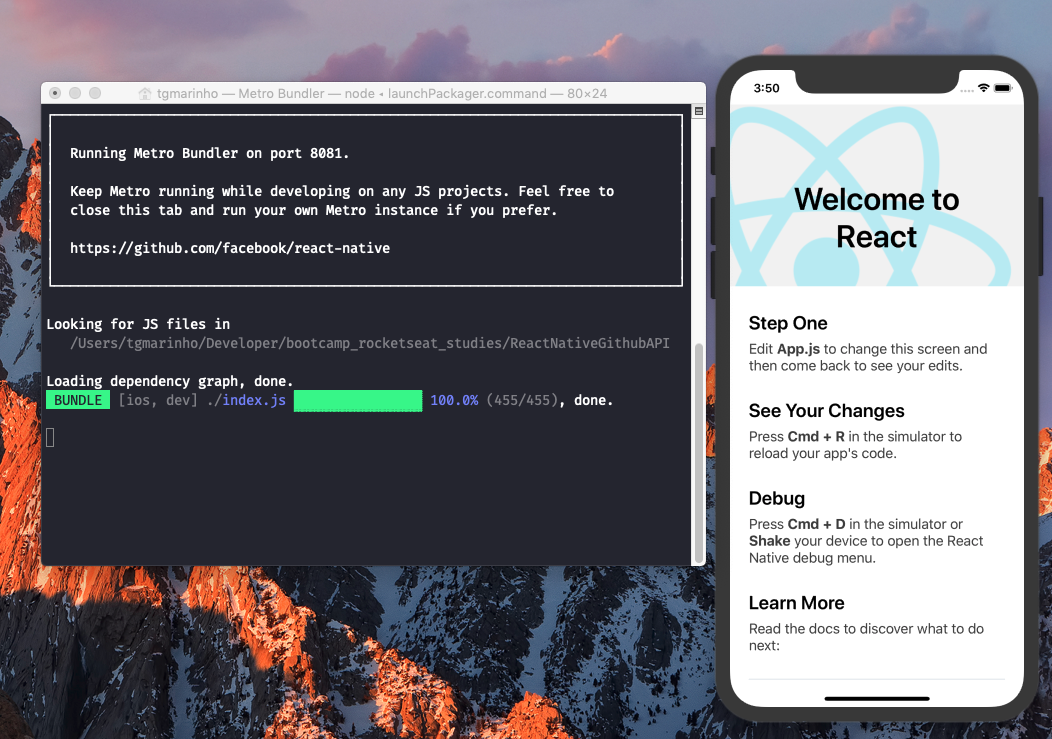
When the emulator opens, you'll see a Metro Bundler window pop up — keep it minimized.
The Rocketseat docs have a Common Errors section that can help you solve some issues.
If Metro Bundler didn't open, or you closed it by mistake, you can reopen it with:
react-native startIf the app is already installed, you don't need to run react-native run-ios again — just run react-native start.
Opening the project in VSCode, the main file is App.js, which contains the first screen of the app.
We can simplify that file:
import React from 'react';
import {SafeAreaView, StyleSheet, Text} from 'react-native';

const App = () => {
  return (
    <>
      <SafeAreaView style={styles.container}>
        <Text style={styles.welcome}>Welcome to RN</Text>
      </SafeAreaView>
    </>
  );
};

const styles = StyleSheet.create({
  container: {
    flex: 1,
    justifyContent: 'center',
    alignItems: 'center',
  },
  welcome: {
    fontSize: 24,
    fontWeight: 'bold',
  },
});

export default App;
Notice there's no div or h1 — View works like a div, and Text works like h1, p, h2, etc.
React Native uses Flexbox to position elements.
By default, every RN element has flex-direction: column, stacking elements one below the other. That makes sense since the screen is usually small and elements naturally stack vertically.
Styling is done with CSS-in-JS, written in camelCase and replacing , with ;.
Writing code for React on the web and for Native is very similar with only minor differences, so anyone who already knows ReactJS can pick up React Native easily.
Source code: https://github.com/tgmarinho/intro-react-native/tree/aula-03-criando-projeto
Lesson 04 - ESLint, Prettier and EditorConfig
Let's set up the tools to keep a style guide and a consistent code standard across the project.
To create the editorConfig in VSCode, just right-click the project root and choose generate .editorConfig, then make a few tweaks:
root = true

[*]
end_of_line = lf
indent_style = space
indent_size = 2
charset = utf-8
trim_trailing_whitespace = true
insert_final_newline = true
ESLint
Install ESLint:
yarn add eslint -DIn the terminal, run:
yarn eslint --initAnd configure it as follows:
❯ yarn eslint --init
? How would you like to use ESLint? To check syntax, find problems, and enforce code style
? What type of modules does your project use? JavaScript modules (import/export)
? Which framework does your project use? React
? Does your project use TypeScript? No
? Where does your code run? None
? How would you like to define a style for your project? Use a popular style guide
? Which style guide do you want to follow? Airbnb (https://github.com/airbnb/javascript)
? What format do you want your config file to be in? JavaScript
? Would you like to install them now with npm? Yes
Then remove the package-lock.json file since we're using only yarn, and run yarn in the terminal to update the dependencies in yarn.lock.
If you get an error in the emulator, no problem — leave it for now.
Let's install a few more extensions to configure ESLint:
yarn add prettier eslint-config-prettier eslint-plugin-prettier babel-eslint -DNow we can configure .eslintrc.js:
module.exports = {
  env: {
    es6: true,
  },
  extends: [
    'airbnb',
    'prettier',
    'prettier/react', // prettier + react integration
  ],
  globals: {
    Atomics: 'readonly',
    SharedArrayBuffer: 'readonly',
  },
  parser: 'babel-eslint', // to understand the latest ECMAScript versions
  parserOptions: {
    ecmaFeatures: {
      jsx: true,
    },
    ecmaVersion: 2018,
    sourceType: 'module',
  },
  plugins: [
    'react',
    'prettier', // adding one more plugin
  ],
  rules: {
    'prettier/prettier': 'error',
    'react/jsx-filename-extension': [
      'warn',
      {
        extensions: ['.jsx', '.js'],
      },
    ],
    'import/prefer-default-export': 'off', // allow non-default import/export
  },
};
We'll also create a .prettierrc file to define a few more rules:
{
	"singleQuote":  true,
	"trailingComma":  "es5"
}
Now every time we save a file, Prettier will swap double quotes for single ones and add a trailing , to objects and arrays.
In App.js you'll now see a few warnings — just fix them following the airbnb rules from .eslintrc.js.
If after all this setup your project shows an error, close the Metro Bundler window and run in the terminal:
react-native start --reset-cacheMetro Bundler will reopen and the app should be working again.
Most problems are solved by running:
1 - Solves it most of the time:
react-native start --reset-cacheor
2 - If the previous step didn't solve it, run this to reinstall the app on the emulator:
react-native run-iosSource code: https://github.com/tgmarinho/intro-react-native/tree/aula-04-eslint-prettier-editor-config
Lesson 05 - Setting up Reactotron
With React Native we can debug with console.log just like in the browser.
Open the emulator, press cmd+d or ctrl+d, click debug, and you can debug the app in the browser.
But debugging React Native this way is pretty bad.
An alternative is an external debugger — Reactotron — which integrates very nicely with console.log for React apps as well as Redux and Saga. Its UI is beautiful and fast. Highly recommended. It works on the web too, but it makes less sense there — unless you use Redux, then it becomes more relevant; it also depends on developer preference.
To install, go to the official Reactotron repository and download Reactotron.app for your machine (Linux, Windows, or Mac).
To install the integration library in our project, run:
yarn add reactotron-react-nativeIt must be installed as a project dependency.
After installing, create a src folder and inside it a config folder with a ReactotronConfig.js file:
import Reactotron from 'reactotron-react-native';

if (__DEV__) {
  const tron = Reactotron.configure({ host: '127.0.0.1' })
    .useReactNative()
    .connect();

  console.tron = tron;

  tron.clear();
}
This makes Reactotron run only in development mode.
if (__DEV__) {...To stop ESLint from complaining, declare this variable as a global in .eslintrc:
...
 globals: {
    Atomics: 'readonly',
    SharedArrayBuffer: 'readonly',
    __DEV__: 'readonly',
  },
...
We attach a tron property to console with the Reactotron configuration so we can use it everywhere without importing — just call console.tron.log('my log here'); and it shows up in the Reactotron UI.
console.tron = tron;Every time Reactotron reconnects, I clear the previous logs — not required, just personal preference.
tron.clear();If you're using a physical phone emulator, you need to set host: 'your_ip_192....'.
Reactotron.configure({ host: '127.0.0.1' })If you're on the Android emulator, run in the terminal:
adb reverse tcp:9090 tcp: 9090adb must be on your PATH, or you can use:
~/Android/Sdk/platform-tools/adb reverse tcp:9090 tcp: 9090Now to actually use it, we need to import the config — it can go in index.js, which is the App.js I renamed and moved to the root of the src folder:
import React from  'react';
import { SafeAreaView, StyleSheet, Text } from  'react-native';

import  './config/ReatotronConfig';

console.tron.log('TESTING REACTOTRON CONFIG')
console.tron.log('TESTING REACTOTRON CONFIG', 2  +  3);
...
Source code: https://github.com/tgmarinho/intro-react-native/tree/aula-05-configurando-reactotron
Lesson 06 - React Navigation
Let's use React Navigation to configure the routes for navigation between screens.
To use navigation in the project, we need to install some external React Native libraries.
yarn add react-navigation react-native-gesture-handler react-native-reanimatedreact-native-gesture-handler: handles gestures in the app.
react-native-reanimated: handles animations on navigation transitions.
On Android we need some extra setup after installing react-native-gesture-handler — see the docs:
In android/app/src/main/java/com/YOURPROJECT/MainActivity.java, apply this configuration:
package com.reactnativegithubapi;

import com.facebook.react.ReactActivity;
import com.facebook.react.ReactActivityDelegate;
import com.facebook.react.ReactRootView;
import com.swmansion.gesturehandler.react.RNGestureHandlerEnabledRootView;

public class MainActivity extends ReactActivity {

  /**
   * Returns the name of the main component registered from JavaScript. This is used to schedule
   * rendering of the component.
   */
  @Override
  protected String getMainComponentName() {
    return "ReactNativeGithubAPI";
  }

  @Override
  protected ReactActivityDelegate createReactActivityDelegate() {
    return new ReactActivityDelegate(this, getMainComponentName()) {
      @Override
      protected ReactRootView createRootView() {
       return new RNGestureHandlerEnabledRootView(MainActivity.this);
      }
    };
  }
}
Save the file, and if you're on the Android emulator, run:
react-native run-androidOr if you're running the iOS emulator, go into the ios folder and run:
pod installTo install the native dependencies — on Android this is automatic.
Then run:
react-native run-iosAnd wait for the build to finish!
We'll also add another lib, since a recent update to react-navigation removed the stack navigator and moved it to a separate package:
yarn add react-navigation-stackCreate a src/routes.js file:
import { createAppContainer } from 'react-navigation';
import { createStackNavigator } from 'react-navigation-stack';

import Main from './pages/Main';
import User from './pages/User';

const Routes = createAppContainer(
  createStackNavigator({
    Main,
    User,
  })
);

export default Routes;createAppContainer: works like the BrowserRouter from react-router-dom — it holds the configuration that makes routing work regardless of the type of route. It wraps all routes.
createStackNavigator: a type of route configuration. It automatically creates a header, which you can see visually — easier to demonstrate in the emulator. It's stack-based navigation: every time a user taps a route, the previous one is pushed onto a stack, so the last route is restored when the user presses the back button. With createStackNavigator, routes stay in the background — they aren't destroyed.
We also have:
import { createAppContainer, createSwitchNavigator } from  'react-navigation';
...createSwitchNavigator: doesn't provide any visual feedback like createStackNavigator does (no header). It doesn't keep a stack — when navigating from User to Main, User is destroyed and only recreated if you navigate to it again.
We can also install another type of route:
yarn add react-navigation-tabsAnd use it like:
import { createAppContainer } from 'react-navigation';
import { createBottomTabNavigator } from 'react-navigation-tabs';

import Main from './pages/Main';
import User from './pages/User';

const Routes = createAppContainer(
  createBottomTabNavigator({
    Main,
    User,
  })
);

export default Routes;createBottomTabNavigator: also adds visuals, showing a footer with the route names.
import { createAppContainer } from 'react-navigation';
import { createMaterialTopTabNavigator } from 'react-navigation-tabs';

import Main from './pages/Main';
import User from './pages/User';

const Routes = createAppContainer(
  createMaterialTopTabNavigator({
    Main,
    User,
  })
);

export default Routes;createMaterialTopTabNavigator: also adds visuals, showing the route names in the header with a default color. On the iOS emulator, you need to configure a SafeView to render correctly; on Android it works out of the box — Material UI comes from Google, just like Android, so the integration is smoother.
We can also use react-navigation-drawer:
yarn add react-navigation-drawerAnd use it:
import { createAppContainer } from 'react-navigation';
import { createDrawerNavigator } from 'react-navigation-drawer';
import Main from './pages/Main';
import User from './pages/User';

const Routes = createAppContainer(
  createDrawerNavigator({
    Main,
    User,
  })
);

export default Routes;createDrawerNavigator: adds visuals where the user can swipe in from the left edge to see the app's routes.
For the example app, we'll use createStackNavigator:
import { createAppContainer } from 'react-navigation';
import { createStackNavigator } from 'react-navigation-stack';

import Main from './pages/Main';
import User from './pages/User';

const Routes = createAppContainer(
  createStackNavigator({
    Main,
    User,
  })
);

export default Routes;
To add a title to the Main route's header, edit Main.js:
// ... at the end of the file
Main.navigationOptions = {
	title:  'Users',
};
To make routes follow a consistent style across all operating systems, pass some configuration as the second parameter to createStackNavigator:
import { createAppContainer } from 'react-navigation';
import { createStackNavigator } from 'react-navigation-stack';
import Main from './pages/Main';
import User from './pages/User';

const Routes = createAppContainer(
  createStackNavigator(
    {
      Main,
      User,
    },
    {
      headerLayoutPreset: 'center',
      headerBackTitleVisible: false,
      defaultNavigationOptions: {
        headerStyle: {
          backgroundColor: '#7159c1',
        },
        headerTintColor: '#FFF',
      },
    }
  )
);

export default Routes;
headerLayoutPreset = ensures the title is always centered.
headerBackTitleVisible = shows only the back arrow, not the arrow + previous route title.
defaultNavigationOptions = default NavigationOptions. We can pass headerStyle (which takes a backgroundColor) and headerTintColor (font color).
Now let's style the Main.js page.
For more, read the article: navegacao-react-native from Rocketseat — it's excellent with images and gifs that illustrate things well.
Source code: https://github.com/tgmarinho/intro-react-native/tree/aula-06-react-navigation
Lesson 07 - Configuring StatusBar
The Status Bar is where the time and battery status appear. By default it's black on iOS and gray on Android. Depending on your layout, you may want a different color, like white.
Just import StatusBar from react-native:
src/index.js:
import React from 'react';
import { StatusBar } from 'react-native';

import './config/ReatotronConfig';

import Routes from './routes';

const App = () => (
  <>
    <StatusBar barStyle="light-content" backgroundColor="#7159c1" />
    <Routes />
  </>
);

export default App;
Now the StatusBar — clock, wifi, and battery icons — appears white in the emulator.
For Android, pass this extra config:
backgroundColor="#7159c1"There are other props as well — press cmd or ctrl + space on the component to see the options.
Source code: https://github.com/tgmarinho/intro-react-native/tree/aula-07-configurando-statusbar
Lesson 08 - Styled Components
Styled Components works almost 100% the same as on the web, with a few differences. The library is pure JavaScript, so just install it in the RN project and use it.
yarn add styled-componentsAfter installing, create a styles.js file:
import styled from  'styled-components/native';

export  const Layout = styled.View``;
The difference is that we now have to import /native, and we don't have a div — we have a View. We have to use React Native's native tags.
The reason to use Styled Components is that you can write CSS the same way you do on the web and reuse CSS from a React app in a React Native app, only changing the components — the diff is small. In RN, some styling properties differ from the web, even when using CSS-in-JS with StyleSheet.
React Native has no global styling like the web, where you style body, div, h1, p in a reset. You can't style by tag name alone.
What you can do is build small components and reuse them in many places.
Source code: https://github.com/tgmarinho/intro-react-native/tree/aula-08-styled-components
Lesson 09 - Styling the form
Let's build an app that consumes the GitHub REST API. The form takes a username, fetches some of the user's info, and saves it.
To use icons in React Native, install a library:
yarn add react-native-vector-iconsIt comes with several nice icon sets — MaterialIcons, Font Awesome, etc. See them all here.
With my RN version "react-native": "0.61.1", we don't need:
react-native link react-native-vector-iconsBut we need to go into the ios folder and run pod install, then cd .. and run react-native run-ios again from the project root.
To use it, import in code — here I'm importing from MaterialIcons:
import Icon from 'react-native-vector-icons/MaterialIcons'
Icon.loadFont();
Yes, Icon.loadFont() is mandatory — if you swap MaterialIcons for another font (e.g., FontAwesome), loadFont() must be called again. So it's best to keep it in the code even if you've already called it elsewhere. It's a good idea to centralize this in a config file like loadFonts.js.
Then just apply the icon:
...
<SubmitButton>
	<Icon name="add" size={20} color="#FFF" />
</SubmitButton>
...
The rest of the code is in the commit below.
Source: https://www.tgmarinho.com/utilizando-%C3%ADcones-no-react-native-ios/
Source code: https://github.com/tgmarinho/intro-react-native/tree/aula-09-estilizando-formulario
Lesson 10 - Calling the GitHub API
When the user types a username and taps OK, we need to fetch their GitHub data.
Since we need to manage state, we convert the stateless component to a stateful one using a class or hooks. For now, we'll use a class.
To consume an external API, install axios:
yarn add axiosCreate a services folder inside src, set the GitHub API baseURL, and export it so we can make GET calls.
import axios from 'axios';

const api = axios.create({
  baseURL: 'https://api.github.com',
});

export default api;
Add two state variables: newUser to hold the typed value, and users to store the users.
Create the method called when the user taps send or the + button.
It takes the typed username, calls the GitHub API (which returns a resolved promise with the response data), extracts what we need into a data object, appends it to the users array (creating a new array with the spread operator), and clears newUser so the user can type again.
import React, { Component } from 'react';
import Icon from 'react-native-vector-icons/MaterialIcons';
import { Keyboard } from 'react-native';
import { Layout, Form, Input, SubmitButton } from './styles';
import api from '../../services/api';

Icon.loadFont();

class Main extends Component {
  state = {
    newUser: '',
    users: [],
  };

  handleAddUser = async () => {
    const { users, newUser } = this.state;
    const response = await api.get(`/users/${newUser}`);
    const data = {
      name: response.data.name,
      login: response.data.login,
      bio: response.data.bio,
      avatar: response.data.avatar_url,
    };

    this.setState({ users: [...users, data], newUser: '' });

    Keyboard.dismiss();
  };

  render() {
    const { users, newUser } = this.state;

    return (
      <Layout>
        <Form>
          <Input
            autoCorrect={false}
            autoCapitalize="none"
            placeholder="Add user"
            value={newUser}
            onChangeText={text => this.setState({ newUser: text })}
            returnKeyType="send"
            onSubmitEditing={this.handleAddUser}
          />
          <SubmitButton onPress={this.handleAddUser}>
            <Icon name="add" size={20} color="#FFF" />
          </SubmitButton>
        </Form>
      </Layout>
    );
  }
}

Main.navigationOptions = {
  title: 'Users',
};

export default Main;
This line dismisses the keyboard after the operation:
Keyboard.dismiss();// stores the value of newUser
value={newUser}
// on each text change, save it to state
onChangeText={text => this.setState({ newUser: text })}
// allows the virtual keyboard to submit the form
returnKeyType="send" //
// when send is pressed, call this function
onSubmitEditing={this.handleAddUser} // // Calls the function to add the user
<SubmitButton onPress={this.handleAddUser}>Worth noting: Reactotron logs every API call with status and response data — no need to add console.tron.log.
Source code: https://github.com/tgmarinho/intro-react-native/tree/aula-10-acessando-api-github
Lesson 11 - Styling the list
Let's style the user list.
Listing in RN is different from the web — there are no ul and li tags, and we don't use .map. RN has its own component for this: FlatList.
In the same index.js of Main, we import more styled components we'll create.
...
import {
  Layout,
  Form,
  Input,
  SubmitButton,
  List,
  Avatar,
  User,
  Name,
  Bio,
  ProfileButton,
  ProfileButtonText,
} from './styles';
...
And add this at the end of </Form>:
 <List
   data={users}
   keyExtrator={user => user.login}
   renderItem={({ item }) => (
     <User>
       <Avatar source={{ uri: item.avatar }} />
       <Name>{item.name}</Name>
       <Bio>{item.bio}</Bio>
       <ProfileButton onPress={() => {}}>
         <ProfileButtonText>View profile</ProfileButtonText>
       </ProfileButton>
     </User>
   )}
 />
It's cool to see React Native components used purely for styling, with no logic, and styling kept separate per component.
Finally, we create the styled components:
export const List = styled.FlatList.attrs({
  showsVerticalScrollIndicator: false,
})`
  margin-top: 20px;
`;

export const User = styled.View`
  align-items: center;
  margin: 0 20px 30px;
`;

export const Avatar = styled.Image`
  width: 64px;
  height: 64px;
  border-radius: 32px;
  background: #eee;
`;

export const Name = styled.Text`
  font-size: 14px;
  color: #333;
  font-weight: bold;
  margin-top: 4px;
  text-align: center;
`;

export const Bio = styled.Text.attrs({
  numberOfLines: 2,
})`
  font-size: 13px;
  line-height: 18px;
  color: #999;
  margin-top: 5px;
  text-align: center;
`;

export const ProfileButton = styled(RectButton)`
  margin-top: 10px;
  align-self: stretch;
  border-radius: 4px;
  background: #6159c1;
  justify-content: center;
  align-items: center;
  height: 36px;
`;

export const ProfileButtonText = styled.Text`
  font-size: 14px;
  font-weight: bold;
  color: #fff;
  text-transform: uppercase;
`;
Highlight for the attribute:
showsVerticalScrollIndicator: false,It hides the FlatList scroll bar, giving a nicer feel to the app.
...
styled.Text.attrs({
	numberOfLines: 2,
})`
...
Truncates the text to two lines and adds ... at the end.
See the result so far:

Source code: https://github.com/tgmarinho/intro-react-native/tree/aula-11-estilizando-listagem
Lesson 12 - Loading and disabled
Let's add a loading indicator while fetching the user from the API, and dim the button's opacity, since RectButton doesn't have a disabled option — we'll just handle it visually.
Check the source code!
Source code: https://github.com/tgmarinho/intro-react-native/tree/aula-12-loading-disabled
Lesson 13 - Saving to Storage
Let's save user data to the phone's storage so we can read it directly from the device — usable offline, and we can delete entries without any issues.
First, install the library:
yarn add @react-native-community/async-storage Then run the commands:
For iOS:
cd ios && pod install & cd ..
react-native run-ios
And on Android:
react-native run-androidAsyncStorage is similar to the browser's LocalStorage, and it's asynchronous, so we have to use async/await.
There's no fixed size limit for AsyncStorage — depending on the phone's storage capacity, you can store data while there's still disk space.
To use it, just import:
import AsyncStorage from '@react-native-community/async-storage';Create a constant for a key — AsyncStorage is a key-value database backed by SQLite3 (or https://rocksdb.org/ on Android).
const KEY_ASYNC_STORAGE = '@intro-rn:users:key';Like on the web, we use React's lifecycle:
Whenever the users array state updates, if it changed, we update the KEY_ASYNC_STORAGE value with the new array. Here it's not immutable — we really update the value without copying the array like in this.setState.
  componentDidUpdate(_, prevState) {
    const { users } = this.state;
    if (prevState.users !== users) {
      AsyncStorage.setItem(KEY_ASYNC_STORAGE, JSON.stringify(users));
    }
  }
When the user refreshes or comes back to the users screen and the component mounts, we read the data from AsyncStorage and populate the users state.
 async componentDidMount() {
    const users = await AsyncStorage.getItem(KEY_ASYNC_STORAGE);
    if (users) {
      this.setState({ users: JSON.parse(users) });
    }
  }
Now we have data saved and can change, remove, or add more — using other keys as needed.
Source code: https://github.com/tgmarinho/intro-react-native/tree/aula-13-salvando-no-storage
Lesson 14 - Performing navigation
Now let's handle route navigation: when the user taps a button, we redirect to another route. In our app, tapping VIEW PROFILE takes us to another screen.
In routes.js, the createStackNavigator method we used to configure the routes creates a prop called navigate.
It's through this navigate prop that we call routes, since React Native has no <a href> from html (jsx) or Link from react-router-dom.
So on the ProfileButton's onPress, we pass the user as a reference to a new function that handles navigation:
...
<ProfileButton  onPress={() =>  this.handleNavigate(item)}>
...
The handleNavigate function receives the user. We destructure navigation from props (it comes from routes.js's createStackNavigator). We take the user and call navigate, passing the User route known to routes.js, along with the user data as an object:
...
  handleNavigate = user => {
    const { navigation } = this.props;
    navigation.navigate('User', { user });
  };
  ...
Finally, the Users.js page reads the params from navigation:
...
export default function User({ navigation }) {
  console.tron.log(navigation.getParam('user'));
  return <View />;
}
...
We access the data by calling getParam with the same user key we used earlier.
Now the user data is logged in Reactotron.
Source code: https://github.com/tgmarinho/intro-react-native/tree/aula-14-realizando-navegacao
Lesson 15 - Fetching data from the API
When the user taps VIEW PROFILE, the User component shows the user's profile and we'll fetch the repositories the user starred.
First, let's show the header with the user's name.
static navigationOptions = ({navigation}) => ({
  title: navigation.getParam('user').name
});
navigationOptions is a static attribute used to set a title in the navigated screen's header, among other options.
import React, { Component } from 'react';
import PropTypes from 'prop-types';
import { View } from 'react-native';
// import { Layout } from './styles';
import api from '../../services/api';

export default class User extends Component {
  static navigationOptions = ({ navigation }) => ({
    title: navigation.getParam('user').name,
  });

  state = {
    stars: [],
  };

  async componentDidMount() {
    const { navigation } = this.props;
    const user = navigation.getParam('user');
    const response = await api.get(`/users/${user.login}/starred`);

    this.setState({ stars: response.data });
  }

  render() {
    const { stars } = this.state;
    return <View />;
  }
}

User.propTypes = {
  navigation: PropTypes.shape({
    getParam: PropTypes.func,
  }).isRequired,
};
We declare componentDidMount as async because after the screen mounts, React calls the method, which hits the GitHub API for the user's starred repositories.
Finally, we just verify in Reactotron that the API was called — note there's no console.tron.log, since Reactotron logs every API call automagically.
Source code: https://github.com/tgmarinho/intro-react-native/tree/aula-15-buscando-dados-da-api
Lesson 16 - Listing favorites
Now we'll style the page that lists the user's starred repositories.
The work here is mostly styling:
Create a styles.js file inside the User folder.
Import the new styled components in the User's index.js:
import {
  Layout,
  Header,
  Avatar,
  Name,
  Bio,
  Stars,
  Starred,
  OwnerAvatar,
  Info,
  Author,
  Title,
} from './styles';
And in render, build the screen using these components:
render() {
    const { stars } = this.state;
    const { navigation } = this.props;
    const user = navigation.getParam('user');

    return (
      <Layout>
        <Header>
          <Avatar source={{ uri: user.avatar }} />
          <Name>{user.name}</Name>
          <Bio>{user.bio}</Bio>
        </Header>

        <Stars
          data={stars}
          keyExtractor={star => String(star.id)}
          renderItem={({ item }) => (
            <Starred>
              <OwnerAvatar source={{ uri: item.owner.avatar_url }} />
              <Info>
                <Title>{item.name}</Title>
                <Author>{item.owner.login}</Author>
              </Info>
            </Starred>
          )}
        />
      </Layout>
    );
  }
Note we're using FlatList to display a dynamic, scrollable list.
Now only the challenge remains — just for refining the app.
See the final result so far:
Some images:


Source code: https://github.com/tgmarinho/intro-react-native/tree/aula-16-listando-favoritos
Final lesson - Implemented challenge
Repository loading
- Add a loading indicator using
ActivityIndicatorbefore the starred repositories list loads on the User details screen.
First, I create a custom ActivityIndicator to display centered on the screen, in purple.
export const Loading = styled.ActivityIndicator.attrs({
  color: '#7159c1',
  size: 50,
})`
  flex: 1;
  justify-content: center;
  align-items: center;
  margin-top: 20px;
`;
I create a loading prop with true as the initial value, and set it to false after loading — since once the list loads, it won't be empty, so the loading indicator won't reappear.
Infinite scroll
Add infinite scroll to the starred repos list. When the user reaches 20% from the end of the list, fetch the next page and append items. Your code will look like this:
<Stars
  onEndReachedThreshold={0.2} // Loads more items when reaching 20% from the end
  onEndReached={this.loadMore} // Function that loads more items
  // Rest of the props
>
To request a new page from GitHub, use a page parameter in the URL:
https://api.github.com/users/diego3g/starred?page=2Pull to Refresh
Add a feature where, when the user pulls the starred repos list down, the list refreshes by resetting state — pagination goes back to page 1, showing only the first 30 items.
The "Pull to Refresh" feature is built into FlatList and can be implemented like this:
<Stars
  onRefresh={this.refreshList} // Fires when the user pulls the list down
  refreshing={this.state.refreshing} // true/false state telling whether the list is refreshing
  // Rest of the props
>
WebView
Create a new screen that opens when the user taps a starred repo. The screen should contain only the app header. The content will be a WebView — an embedded browser showing the html_url attribute from the repository object returned by the GitHub API.
WebView usage documentation: https://github.com/react-native-community/react-native-webview/blob/master/docs/Getting-Started.md
Source code: https://github.com/tgmarinho/intro-react-native/tree/aula-final-desafio-implementado
Now just check the result!
Image credit from this post
Written by AI, reviewed by Thiago Marinho
September 28, 2019 · Brazil