How to create an agentic portrait particle reveal
Agentic portrait particle reveal: learn how to create a Canvas 2D brush with typed arrays, local reveal, lazy loading, and a demo video.
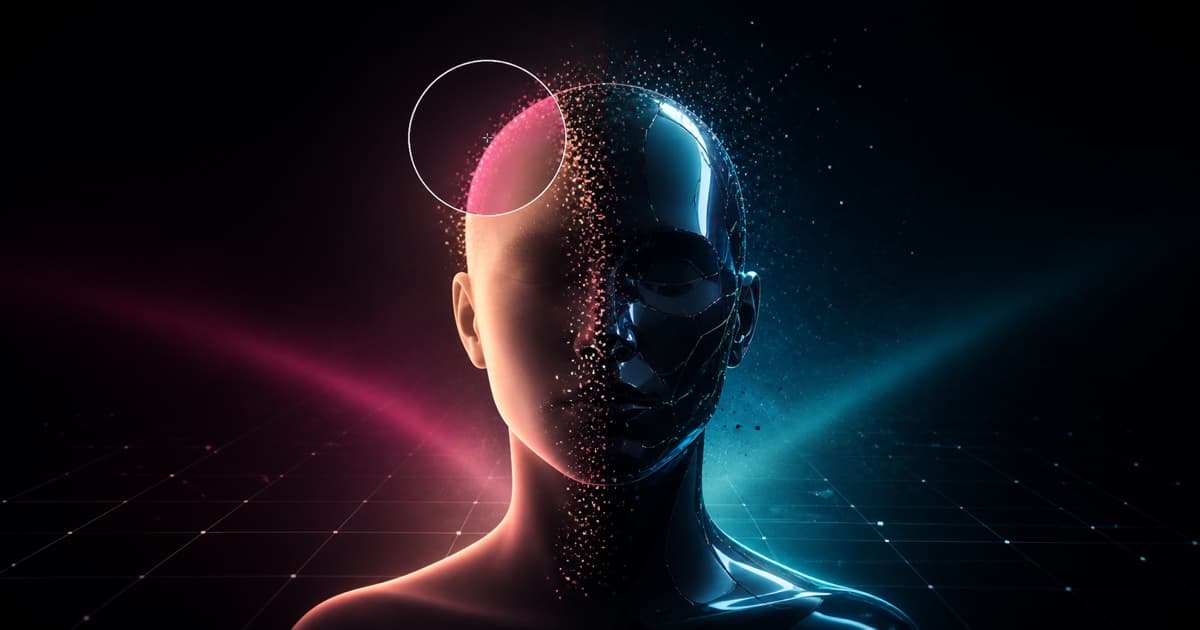
An agentic portrait particle reveal works best when the image stays crisp and the effect appears only where the user interacts. In this tutorial, the goal is to create a Canvas 2D brush that reveals a second image locally, with particles only at the reveal edge.
What are we building?
We are building a hover reveal between two images with the same framing: a human version and an agent version. The page does not swap the whole image. It only transforms the region touched by the cursor, while the rest of the portrait stays stable.
In practice, the visitor sees three layers:
| Layer | Role |
|---|---|
| Base portrait | Shows the agent version, drawn crisply on the canvas. |
| Reveal brush | Shows the human version inside a soft circle. |
| Particle ring | Granulates the brush edge and creates the regeneration effect. |
This difference matters. The goal was not to place an animation over the image. The goal was to make the image itself feel like it was changing state.
Which assets do you need?
You need two images with similar pose, scale, and framing. The effect depends on that. If the human face is higher than the agent face, or if the agent has a different crop, the brush still works, but the transition feels misaligned.
Use this checklist:
| Item | Recommendation |
|---|---|
| Base image | The version shown at rest, for example the agent portrait. |
| Reveal image | The version shown inside the brush, for example the human face. |
| Background | Transparent PNG when possible. |
| Size | Same aspect ratio and visual framing. |
| Origin | Same domain, or CORS configured for getImageData. |
The CORS point matters because the canvas must read pixels. If the image comes from another domain without permission, getImageData fails with SecurityError. To avoid that, keep images in /public or load remote images with the right headers.
Why not use only a crossfade?
A crossfade between transparent PNGs is simple: one image enters, another leaves, maybe with a wipe and some glow. It works for a passive transition, but it does not create a live surface.
The Canvas brush solves three problems:
- The interaction now responds to the cursor.
- The base image stays sharp.
- The transformation happens only where the user touches.
The main technical point is avoiding the checkered look. If you render the whole portrait as a grid of dots, the photo loses quality. The fix is to use particles only in the transition ring.
How does Canvas 2D make the reveal?
Start with two transparent images with the same framing:
const HUMAN_SRC = "/images/hero/portrait-human-v2-removebg.png";
const AGENT_SRC = "/images/hero/portrait-agent-v2-removebg.png";
If the source images are not square, use one consistent centered crop. The crisp drawing and the particle sampling must use the same image window.
Image loading can stay as a small Promise:
function loadImage(src: string): Promise<HTMLImageElement> {
  return new Promise((resolve, reject) => {
    const img = new window.Image();
    img.crossOrigin = "anonymous";
    img.onload = () => resolve(img);
    img.onerror = reject;
    img.src = src;
  });
}
Then load both images together:
const [baseImg, revealImg] = await Promise.all([
  loadImage(baseSrc),
  loadImage(revealSrc),
]);
The render loop follows this sequence:
- Clear the canvas.
- Draw the agent portrait with
drawImage. - Draw the human portrait into an offscreen buffer.
- Apply a radial mask with
destination-in. - Copy the buffer over the base.
- Draw particles only at the brush ring.
The concept looks like this:
ctx.drawImage(agent, sx, 0, sw, sw, 0, 0, W, H);

bctx.drawImage(human, sx, 0, sw, sw, 0, 0, W, H);
bctx.globalCompositeOperation = "destination-in";
bctx.fillStyle = radialGradient;
bctx.fillRect(cx - r, cy - r, r * 2, r * 2);

ctx.drawImage(buffer, 0, 0);
The radial mask is the detail that avoids a hard edge. The brush does not punch a transparent hole into the base. It only limits the human layer before compositing it over the agent layer.
How do you create the soft brush?
The brush is a normalized cursor position, from 0 to 1, converted to pixels on each frame:
const cx = mouse.x * width;
const cy = mouse.y * height;
const radius = brushRadius * Math.min(width, height);
To create the soft edge, paint the reveal image into an offscreen canvas and apply a radial mask:
const gradient = bufferCtx.createRadialGradient(
  cx,
  cy,
  radius * 0.4,
  cx,
  cy,
  radius,
);

gradient.addColorStop(0, "rgba(0,0,0,1)");
gradient.addColorStop(1, "rgba(0,0,0,0)");

bufferCtx.globalCompositeOperation = "destination-in";
bufferCtx.fillStyle = gradient;
bufferCtx.fillRect(cx - radius, cy - radius, radius * 2, radius * 2);
Do not use destination-out on the main canvas to open the reveal. It erases the base and can create a transparent hole. The offscreen buffer keeps the base intact.
How are the particles calculated?
The particles come from sampling both images into a grid. The code draws each portrait into a small canvas, reads pixels with getImageData, and stores colors in typed arrays.
That creates a structure with no object allocation inside the hot loop:
| Data | Use |
|---|---|
homeX, homeY | original particle position |
dirX, dirY | stable stream direction |
dist | individual displacement amount |
| human colors | color inside the reveal |
| agent colors | color outside the reveal |
On each frame, the code checks the distance from each cell to the cursor. Only cells near the brush edge are drawn.
const ed = d - BRUSH_R;
if (ed <= -BRUSH_BAND || ed >= BRUSH_BAND) continue;
That continue keeps the effect cheap. Most of the image never becomes particles. It stays as a crisp photo.
How do you tune the effect?
Start with small values. Then increase density and glow only if the device can handle it.
| Parameter | Good start | What it changes |
|---|---|---|
brushRadius | 0.3 | Size of the revealed area. |
brushBand | 0.13 | Thickness of the particle ring. |
grid | 160 | Number of sampled cells. Higher makes particles finer. |
streamDistance | 0.15 | Maximum particle displacement. |
streamAngle | 2.4 | Flow direction. |
streamSpread | 0.9 | Flow spread. |
glowRGB | [170, 240, 255] | Color the particles glow toward. |
If the effect feels heavy, reduce grid first. If it looks good but visually noisy, reduce brushBand. If it feels like a normal crossfade, slightly increase streamDistance and particle glow.
Which bugs had to be avoided?
The first bug was a blank canvas after a hard refresh. The cause was ResizeObserver: changing canvas.width and canvas.height clears the drawing. If requestAnimationFrame had already parked, nothing repainted until the first hover.
The fix was to schedule a repaint inside resize:
const resize = () => {
  canvas.width = Math.round(W * dpr);
  canvas.height = Math.round(H * dpr);
  schedule();
};
Four more safeguards went in:
- Cap
devicePixelRatioat 2 for retina without too much cost. - Use
imageSmoothingEnabledfor crisp drawing. - Reduce the grid on low power environments.
- Drive an automatic brush path for touch and
prefers-reduced-motion.
The goal was to keep the effect present on mobile without depending on hover.
How did the hero avoid a performance cost?
The portrait is atmosphere, not the primary content. It should not compete with the hero copy for Largest Contentful Paint.
The solution was to split the component into HeroPortraitLazy:
const HeroPortraitInner = dynamic(
  () => import("./hero-portrait").then((m) => m.HeroPortrait),
  { ssr: false },
);
The wrapper reserves the final space with aspect-square, but the canvas mounts only after hydration. That avoids layout shift and keeps the effect out of the critical first paint path.
How do you apply this in a Next.js project?
In a Next.js App Router project, split the effect into two components: a Canvas component and a lazy wrapper. The Canvas component must be a client component because it uses window, Image, ResizeObserver, pointer events, and requestAnimationFrame.
| Part | Responsibility |
|---|---|
HeroPortrait | Loads images, samples pixels, runs the canvas loop, and draws the reveal. |
HeroPortraitLazy | Uses dynamic(..., { ssr: false }) to mount the effect after hydration. |
| Page hero | Reserves space with aspect-square and renders the lazy component. |
The wrapper can stay small:
const HeroPortraitInner = dynamic(
  () => import("./hero-portrait").then((m) => m.HeroPortrait),
  { ssr: false },
);

export function HeroPortraitLazy() {
  return (
    <div className="aspect-square w-full">
      <HeroPortraitInner />
    </div>
  );
}
This keeps the tutorial portable to any hero: the text loads first, the visual space is reserved, and the canvas enters as an interactive layer.
Where is the complete code?
The complete code is in the main repository. After this PR is merged, these links point to the main version:
| Resource | Link |
|---|---|
| Isolated implementation | reference/PortraitReveal.tsx |
| Technical explanation | reference/technique.md |
I also added a reusable skill for anyone who wants to ask a coding agent for the same effect:
| Skill | Link |
|---|---|
particle-portrait-reveal | .cursor/skills/particle-portrait-reveal |
| Skill instructions | SKILL.md |
Use the skill when you want to create a reveal between two portraits, a cursor dissolve effect, or a human-to-agent visual transition without rewriting the technique from scratch.
TL;DR
The agentic portrait particle reveal works because it separates image from effect. The image stays crisp with drawImage; the human reveal enters through a radial mask in an offscreen buffer; particles appear only in the brush ring; and the component loads lazily so it does not hurt the hero.
The visual result looks more complex than the architecture. That is the good part: a rich interaction, built with Canvas 2D, no extra library, and cost focused only where the user is looking.
Written by AI, reviewed by Thiago Marinho
August 14, 2026 · Brazil